Monday, December 31, 2018

Seasons Givings Blog Hop

45828276_10155894550108317_5501184366883110912_n
Welcome to the Seasons Givings Blog Hop for 2019!  It's been another amazing year in the creative world.  I'm blessed beyond words to work for so many amazing companies and to have the support of friends and fans like you!  To celebrate I have TWO giveaways going!  The first one is here and the second one is over at my YouTube Channel!
 

My Giveaways

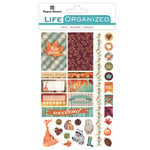
Since this is the Seasons Givings Hop I couldn't resist giving away the Seasonal Sticker Book from Paper House Productions!  This was one of their new releases this fall and I just love it!
stbk-0004e_1024x1024@2x
 
In addition to that the winner will have their choice of either one of a paper pads or planner from Paper House Productions!  To enter just leave me a comment below telling me what country or state you are visiting from.  My 6 year old Geography buff will get a kick out of seeing the comments!  I will leave comments open thru the end of the day on the 4th.  A winner will be announced here and on my Facebook page on the 5th.
 
My Second giveaway is taking place over on YouTube in correlation with this video!  This is a walk-thru of all my favorite projects from this year!

Here's the whole Blog List for the Hop:


Thanks for stopping by - be sure to head to Lisa Heke next!

Friday, November 30, 2018

Coffee Lovers Blog Hop

Today is the Coffee Lovers Blog Hop and I'm playing along over on the Scrapbook Adhesives by 3L Blog!  Here's a sneak of what I created - now run over there and get yourself in on the fun and prizes ;)


Saturday, November 24, 2018

DIY Phone Stand

I'm all about being creative and I'm also all about practicality.  Oftentimes amongst my crafts, I find myself craving doing something that is practical.  So when I saw the Regular Phone Stand in the Clear Scraps Store, I knew I had to snag it!  If for no other reason than maybe it will save me time every week searching for my phone underneath all my scrapbooking papers!  Let's take a look at this useful product!
ChristineMeyer-PhoneStand1
As I considered decorating it, i had a lot of ideas! This stand is made of acrylic. I could use paint or vinyl or washi....their were very few paper crafting items that I didn't consider!  In the end I decided to go with a patterned paper.  Specifically a patterned paper that I hadn't used a lot of on a scrapbook layout or card but really love!  This way I could look at it for a long time!  I added a cut-apart piece with the phrase "Make Ideas Happen" onto the top - figuring that it might provide some inspiration as I craft.  I also had some flat butterfly stickers.  Anything with dimension was out because then my phone wouldn't lay flat.
ChristineMeyer-PhoneStand2
You can see that my phone fits on it nicely.  I also tried some bigger phones and those were all great too!
ChristineMeyer-PhoneStand3
One of the details I really like about this is that it comes together very easily - just two quick pieces of acrylic that slide into place.  I also appreciate how easily I can still charge my phone thanks to the notch opening you see pictured!  Let's take a look at a quick video of how I put this together!

You can check out any of the supplies from this project by clicking on the affiliate thumbnails below!

Monday, November 19, 2018

December Bullet Journal Future Log - Clear Scraps

After playing with the 6 inch Calendar Mascil last month for my Bullet Journal, I knew it was going to be a staple in my monthly creations.  Today I am sharing an example of how I used it to create my December Future Log for my Bullet Journal using a couple of different Mascils!  I needed to get an early jump on this spread because December is SO busy!  Here's how the full spread turned out:
ChristineMeyer-DecemberBJ1
Lots of reds, greens, and gold foil help give the whole spread the holiday feel I was going for!  But the real showstopper is the 6 inch Stars Mascil that you can see on the left hand side of my spread!
ChristineMeyer-DecemberBJ2
By doing one layer of red stars and then topping it with another layer of red stars I was able to create a unique background for my list.  Distress Oxide Inks worked nicely for creating multiple layers. To keep my stencil in place i used some Repositionable Adhesive Dots.  I masked out the area for the list using some old packaging and then drew the lines in following the dot grids already in my notebook.   I outlined the whole box with some washi tape.
ChristineMeyer-DecemberBJ3
On the opposite side I stuck with markers and pens using the Mascil as a tracing stencil. I used a fine tip marker for the tracing and then a regular tip one to fill it in.  I added in stickers for my borders and numbers.  Let's take a look at a process video to show you how I created both sides!


Thanks so much for joining me today - have fun playing with those Mascils!

-Christine

Supplies Used: 6 inch Stars Mascil, 6 inch Calendar Mascil, Distress Oxides (Ranger), Pens ( Marvy), Stickers (Paper House Productions), Washi Tape (Paper House Productions), Soft Cover Journal (Paper House Productions), Adhesives (Scrapbook Adhesives by 3L)

Saturday, November 10, 2018

Bullet Journal Future Log

Over the last few months I have gotten more and more into Bullet Journaling.  It's an organizational hobby that allows you do some planning and tracking and add as much creativity as you'd like.  I wasn't sure if I'd get hooked on it but the more I played, the more I knew I liked it! As soon as I laid eyes on the 6 inch Calendar Mascil, I knew it would be perfect for my Bullet Journal! 
November Future Log
A Future Log is a place to keep your plans for upcoming months that you can then use to tranfer to your real time planner at the right time.  I knew with the holidays coming I was going to need to get some November dates recorded!
MascilCu3
On the left hand side I used the Wood Grain Mascil to create my background.  I laid down cardstock to block out the area where I didn't want the ink.  Then I did one layer with Distress Oxide and dried it.  I took the stencil off and followed up with a second layer of light inking to remove all the white.  Some stickers and washi tape finish the whole side off.
Mascil CU1
The other side is where I used the 6 inch Calendar Mascil!  I used that and traced my boxes and letters.  I then used stickers to fill in the numbers.  Hand lettering and stickers pull the whole thing together!  If any of this seems confusing, I've got good news!  Here's a process video that will walk you thru the whole thing!


The 6 inch  Mascils fit the width of an A5 Journal nearly perfect - I know this is going to be a staple in my upcoming journaling!  On to December and tracking all the madness that goes with the holidays ;)

Monday, October 22, 2018

DIY Anniversary Wood Heart Pallet

I've recently joined the team at Clear Scraps for a new adventure in design team work.  Clear Scraps is unlike anything I've done before with a lot more options in home decor and crafts, but you will still see some of my normal paper crafts mixed in too!. Today is my very first post and I'm kicking it off with a home decor piece!

Anniversary Heart Pallet

The moment I laid eyes on the Heart DIY Pallet Shape, I knew exactly what I wanted to create with it!  Some dear friends are celebrating their 25th Anniversary this month.  The wife had recently mentioned liking this saying, so I filed that moment in my head, knowing that I could create something special for them!
DIY Anniversary or Wedding Gift - Wood Heart Pallet


Isn't that the cutest phrase?  It could work for any year too!  Creating this took a little time but only because I was a little fussy in creating it!

Heart Pallet Close-ups


I did several layers on it for the base - combining wood stain and white acrylic paint.  My final layer was white acrylic paint and then I really roughed it up!  Sand paper, nails, you name it, I worked hard to make it as rustic looking as possible.  I actually kind of love this "farmhouse" style for this reason: no stress in getting the paint line free or if you miss a spot!  The imperfections are embraced!


Once all the paint had dried, I cut out words using my electronic cutting machine.  I considered tracing them and painting, but I had brown vinyl.  I knew that would be a little less work and if it went on bad, I could pull it up and paint it instead.  Thankfully it went very smoothly!  I love how the whole thing came together and can't wait to see the happy couple's faces when I give it to them!  Thanks for joining me today and be sure to visit the Clear Scraps Shop to get your hands on these beautiful Wood Pallets!  Think about all the holiday gifts you can start creating - personalized and fun for you too!


Monday, October 15, 2018

Autumn Pumpkin Pallet - DIY Farmhouse Decor

My house is severely lacking in Autumn decor - be it Halloween or Thanksgiving or just general fall themed - it's almost non-existent!  Enter the fabulous Tall Pumpkin DIY Pallet to the rescue!  Christine joining you with a fun and EASY home decor piece for this gorgeous season!

Tall Pumpkin DIY Pallet

DIY Fall Farmhouse Decor

Tall Pumpkin DIY Pallet Close-ups

When I originally started working, I thought I'd use this as porch decor.  But when I set it down on my fireplace hearth I really liked how it looked - so it's staying right there!  Flanked by a couple of pumpkins and a cute little scarecrow, it really brightens up the room!

Seeing as I can't seem to get fall decor up,  this needed to be a pumpkin that could hang around longer than October. Additionally, I knew I wanted to take a slightly less traditional approach to decorating this.  Rather than painting it orange, I opted for all white!  In doing so I was able to give it that farmhouse feel that I just can't get enough of!  I then hustled off to a dollar store and got some leaves.  I adhered those to the bottom using Adhesive Dots as well as weaving their stems between the pallets for extra hold. Just adding leaves and avoiding any Halloween specific decor made it so it can last all fall, until I am ready to get out those Christmas decorations!


Painting it white only required two layers of paint.  Once the paint dried I sanded it a bunch to rough it up. Then I added some brown paint streaks.  I didn't allow those to dry completely before I smudged them up.  I wanted to create a distressed look with those so I simply wiped over them with a rag and then once completely dry ran my sand paper over them again.  All in all it was a fun creation and I'm really happy with how it turned out!  Be sure to check out all the Wood Pallet Shapes over at the Clear Scraps shop!

Tuesday, September 18, 2018

Bullet Journaling - Beginner Ideas - Part 1

Have you gotten the Bullet Journal bug?  I have!  Today I want to share with you some of my recent bullet journal creations as well as some videos and ideas to help you get started! 

What is a Bullet Journal?

Bullet Journaling can take on a lot of forms - but generally consists of the following:

  • Index
  • Weekly or Daily or Monthly (or all of them) plans
  • Trackers and Collections
It can look like a planner or it can look more like a journal or it can even look like a bunch of lists.  Many add creative touches to it and include stickers and washi tape.  Some just use pens and stencils.  One of the things that was helpful to me was joining the Bullet Journal Junkies group on Facebook.  It's a constant flow of ideas from a wide variety of styles!

For mine, I knew I needed a couple of things from a Bullet Journal.  I needed help tracking my to-do list.  I also wanted somewhere to track or collect my thoughts on a variety of things.  This included books I'm reading, fun places I've visited, my wishlist, etc.

I decided to work in a Traveler's Notebook - specifically the Journey Books from Paper House Productions.  

I have one for my Weekly To Do Lists.  This has been tremendously helpful for just keeping up on smaller tasks.  I still use a traditional planner for the bigger things - but this one fills a need of all those things that get lost in my brain and I need to keep track of!

I made a video as I made this one!  Here it is:


Having started with the weekly spreads, I knew I wanted to dive in more.  Next up I will cover how I have begun to do tracking/collection pages in Bullet Journal!

Check out any of the affiliate thumbnails below for the products from this project!

Thursday, August 30, 2018

Adding Special Details to your Traveler's Notebook

Traveler's Notebooks can be great for a variety of purposes from planning to bullet journaling to memory keeping. Today I am going to show you one of mine that I use for memory keeping and how I used adhesives from Scrapbook Adhesives by 3L to add some special details to it!

**I receive products from Scrapbook Adhesives by 3L and Paper House Productions for use in my projects. The opinions are completely my own based on my experience and doing so I can share what I personally love to use.**

To check out all the details up close on this you can head here.

I also have a process video to walk you thru the whole thing!  Here it is:


Thursday, August 9, 2018

Creating a Unique Scrapbook Background with Adhesive

Creating a fun and unique background on a scrapbook layout is so satisfying!  Adhesives from Scrapbook Adhesives by 3L make it all that much more easy to do - especially if you are willing to think out of the box a little bit! **I receive products from Scrapbook Adhesives by 3L and The ScrapRoom for use in my projects. The opinions are completely my own based on my experience and doing so I can share what I personally love to use.**  Let's take a look at what I came up with using the E-Z Runner Grand with the Repositionable Dots Refill along with my Flavors of the Month Kit from The ScrapRoom.
The entire heart background was created by combining my E-Z Runner Grand with Distress Oxides Ink!  Here's a full video on the process:


Head on over to the Scrapbook Adhesives by 3L Blog to catch all the details on this layout and technique!  If you want to check out any of the supplies from this layout you can click on the affiliate thumbnails below!

Monday, July 30, 2018

How to Add a Shaker Element to your Scrapbook Layouts

Adding a Shaker Element is done a lot on cards but not nearly as often on Scrapbook Layouts.  Today I am showcasing how to do one with some products from Scapbook Adhesives by 3L.  **I receive products from Scrapbook Adhesives by 3L and The ScrapRoom for use in my projects. The opinions are completely my own based on my experience and doing so I can share what I personally love to use.** Here's the layout I made that includes one:
The sunshine on this is a shaker filled with glitter!  You can get all the details up close on the Scrapbook Adhesives by 3L Blog!  And check out my video with all the details!


I used my July Flavors of the Month Kit from The ScrapRoom for the bulk of this layout!  

Tuesday, July 24, 2018

Creating a Scrapbook Layout with Minimal Supplies

Did you know that every Sunday night I am live on the Paper House Productions Facebook Page creating with their fabulous products!?!  This past week I created a layout with the bare minimum supplies and I love how it turned out!  
**I receive products from Paper House Productions for use in my projects. The opinions are completely my own based on my experience and doing so I can share what I personally love to use.**
Create a Scrapbook Layout with Washi Tape and Stickers
For this project I just used a few simple things - click on any of them below (affiliate thumbnails) to check them out up close!
I couldn't get you a thumbnail of the exact 3D Stickers I used BUT if you love them you can find them here. I do think the ones in the thumbnail would work pretty great too!  Let's take a look at my Facebook Live Video to see how it all came together!

Be sure to keep an eye on the Paper House Facebook Page to keep up with all their new products and my crazy AND fun live sessions!

Thursday, July 5, 2018

4th of July Scrapbook Layout Idea

4th of July is always packed with colorful memories!  This year I am using the newest kit from The ScrapRoom to capture those moments!  Here's a layout with the newest kit from The ScrapRoom!
**I receive products from The ScrapRoom for use in my projects. The opinions are completely my own based on my experience and doing so I can share what I personally love to use.**

4th of July Scrapbook Layout Ideas

I made a video to accompany this layout!  Catch my whole process right here!

If you love this page kit - you can check out the entire kit over at The ScrapRoom! Or you can check out the entire collection from Photo Play Paper in the affiliate thumbnails below:

LinkWithin

Related Posts Plugin for WordPress, Blogger...