Showing posts with label storage. Show all posts

Wednesday, March 5, 2014

What Works For Me: Thicker Storage

I finally have a Wednesday off and I wanted to share another installment of "What Works for Me Wednesday."  This week I am going to focus on something that was a huge headache for storing...until I started this method.  Today I am talking about Thickers and how I store my thickers (with a few other dimensional and non-dimensional letter sets thrown in...but mostly Thickers :)

I am not a person who saves my packaging from my embellishments.  It would be great if I was and I have started to try to be more deliberate about that...but I definitely haven't before the last 6 months.
I just simply use a plain white plastic drawer like one that comes in a storage compartment.  Now, with letters in it, it does not fit in as a drawer.  But that's okay because my drawer part got broken by one of my kiddos!  And honestly...I kinda like it being open and just sitting on a shelf!  My container measures about 10 inches wide by 14 inches long.  I only have one drawer because I am a purger and don't have any more Thickers than that!  I know that if you got a little bigger drawer (taller) you could make it work in a shelf system and have several drawers full of Thickers if you have lots!

Here you can see a side view of how they fit in.  If I have kept the packaging, I trim off the top label part but keep the celophane around it (slicing open one long side and one short side for easy access but avoiding the stickyness at the bottom)
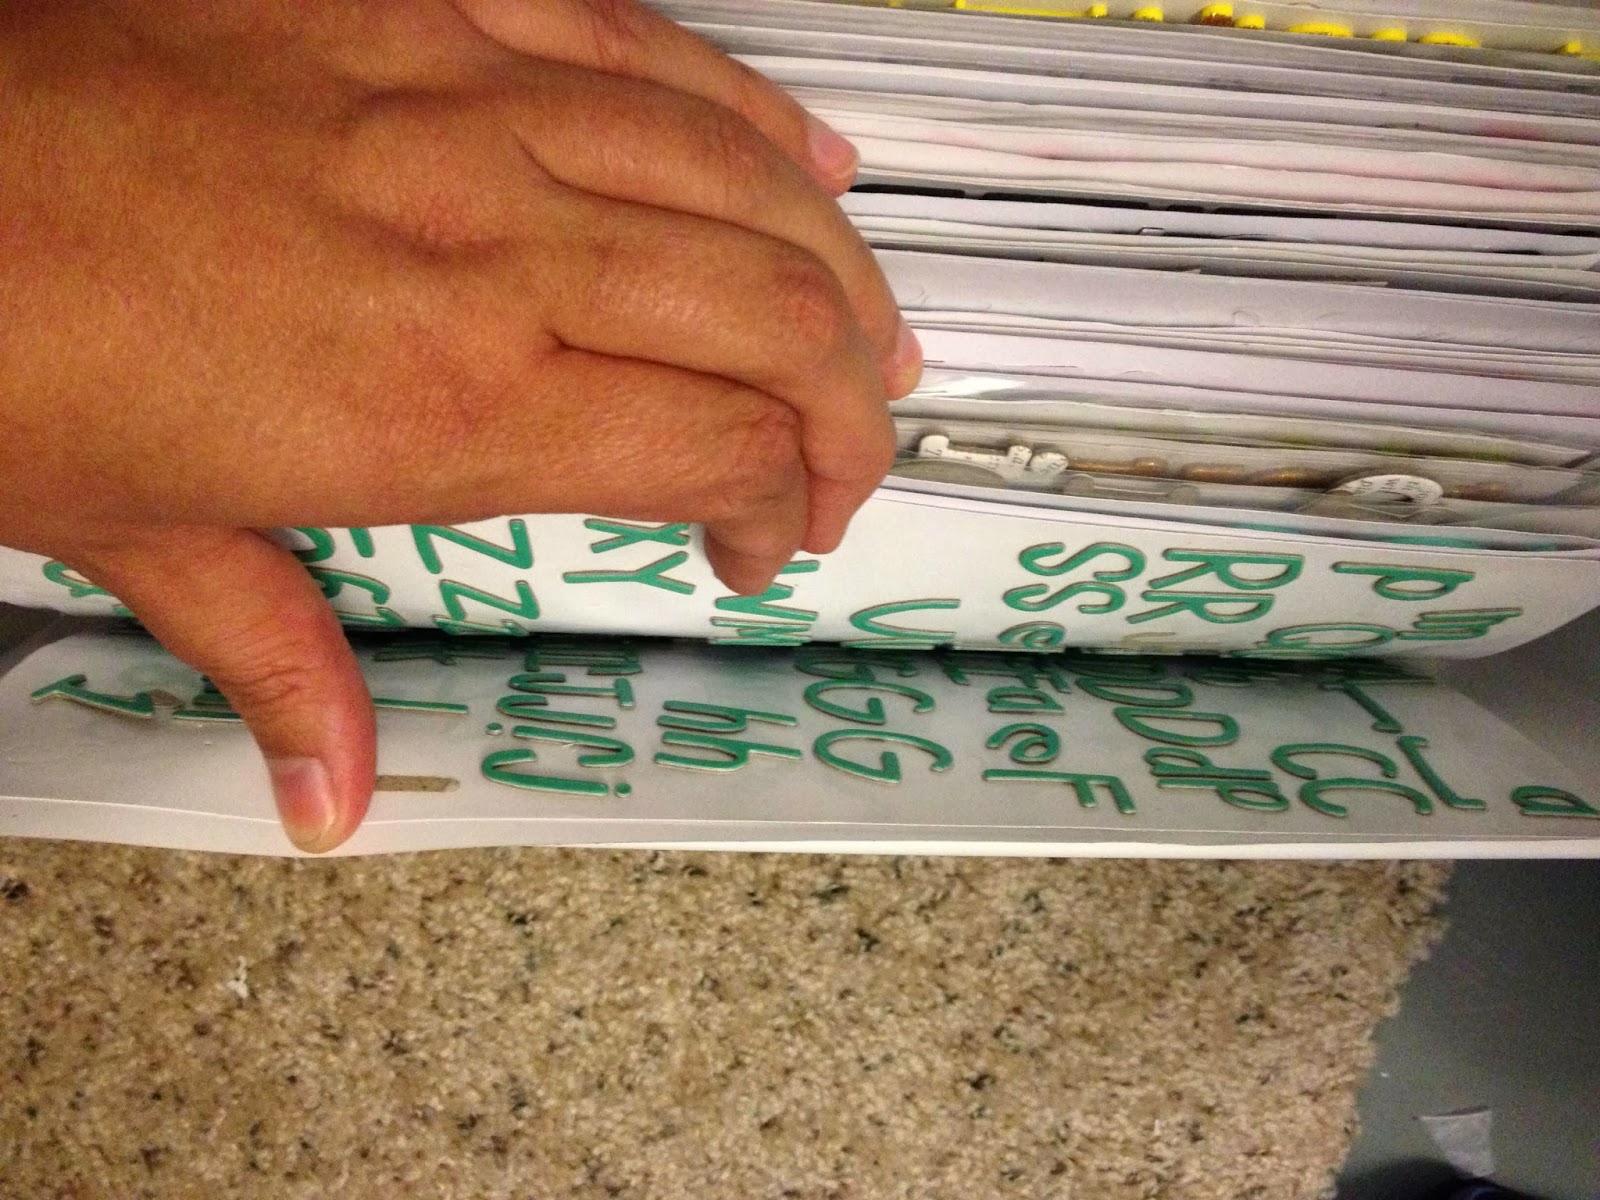
If I don't have the packaging anymore then I put them together facing it's partner...preventing it from rubbing on other and getting lost.

It's a very simple system and has worked great...I just wish I had thought of it sooner ;)


Wednesday, January 29, 2014

What Works for Me: Scrap Storage

I'm back with another installment of "What Works for Me" and this week I'm zoning in on how I store my scraps.  If you are like me, scraps can take over your whole room without even blinking.  I have tried a variety of things....and ultimately it came to this!
I picked up this storage piece at Walmart.  It has drawers big enough to fit 12 X 12 sheets.  When I look for scraps, I am usually looking with a specific size in mind.  Sometimes I need a tall border, other times I need a base for a card or a big piece to stick on a layout, and very often I just need a sliver of something with a specific color.  I almost always cut scraps to have all straight edges.  The only exception to this rule is when their is a print on the back that I might want to use part of and cutting straight will interrupt that pattern.

My first drawer is all border pieces.  Almost all of them are 12 inches long but vary in width.  These include the little 1/2" slivers that you get off of some 12 X 12 sheets.  Those are just one more great addition to the lines.  

The second drawer is small scraps, things that can be used on a card, a photo mat,  or as an accent on a layout.  I only save small layers of papers that I love or have an obscure color on them.  If I don't think I will use it, I pitch it!

My last drawer is big scraps.  These have to be big enough to use as a card base or a significant chunk of a layout.  I go to this drawer first to make card bases before cutting into something else.

Now What Else Have I tried?
I tried storing things by color in ziploc bags
Why that didn't work: Too many bags, too much time to sort it (ask my mom she helped), too many sizes in one place

I tried two drawers - one of patterned papers and one of cardstock
Why that didn't work: Those drawers filled up fast. and then I only took from the top.  Before I knew it I had two years worth of scraps.  Again, every size you can imagine and way too much to sort thru.

Why This Works for Me:
1) The drawers are small enough to look through but big enough to hold a reasonable amount of scraps.  And when the drawer gets fullish then that means it's time to focus on making some cards from scraps.
2) I don't have to dig for the right size.  This is really the key for me to using them!

Do you have a way that you love to store scraps?  Share it with me here or on my Facebook wall!
Wanna check out the "What works for me: Washi Tape Storage" article?  Check it out here!


Wednesday, January 22, 2014

Washi Tape Storage Ideas: What works for me!

I am going to be starting a new regular feature here on the blog about storage.  I have been at this hobby for about 9 years now and I have played with storage from keeping it all in one small suitcase to a big room all to myself.  I am constantly rearranging trying to find new things that work!  Once I'm happy it stays that way...so on Wednesdays that I don't have a design team commitment you can find some fresh storage ideas!  I don't spend a lot of money on storage (I'd rather spend it on supplies) and usually hit garage sales as much as I can.  But if something has stumped me for awhile I'm willing to spend a little to make it work!  Today I spent a little...but it totally works!  I am kicking it off with one that I have been searching for a better way on for a while!!!  Washi Tape!

Here is what I have come up with that I am loving!
This is a mug hanger from Ikea.  I believe it was $5.99 - if I'm wrong then it was less than that.  I also looked at using a plate rack - similar in style but with less stands.  I opted for this because it had a lot of stands!  As you can see I have arranged them pretty much by color with the exception of the multi-colored tapes :).

Now what else have I tried????
I tried hanging a tension rod and putting them on that.
Why that didn't work:  I want to get my washi tape down and in my hands!  I ran out of room long before I had all my tape on it.

I tried putting them all in a box on top of my desk (not neatly arranged or anything...just tossed in).
Why that didn't work:  They were forever getting buried and were out of sight (thus out of mind)

I tried nicely lining them up in a 12 X 12 box.
Why that didn't work: Who has room for a 12 X 12 box on their desk??? Again the out of sight, out of mind thing!

Why this works?
1-I can see exactly what i have and what I NEED more of!
2- It's pretty and let's be honest, we're crafters, that matters!
3- I don't have to sort for that one red roll, it's right there easy to grab

What do you think?  Do you have a brilliant way to store washi tape???? I'd love to have you link me up with it in the comments or on my facebook page!


Tuesday, July 30, 2013

Upcoming Storage Class: Webster's Pages Citrus Squeeze

On August 17th I am going to be teaching a class at The Scrapbooking Studio featuring these five containers perfect for your craft room or area.  They feature the beautiful Citrus Squeeze line from Webster's Pages!


These simple storage pieces are designed by fellow Ribbons Unlimited Design team member Jamie and cut out on my Silhouette Cameo.

Pencil (or scissors, ruler, markers...) holder

Round marker box

Desk caddy (my kids have requested these now)

Washi Tape Holder with two different sized drawers to accomodate different sized rolls.

This last box is awesome!  It can hold alcohol inks, stickles, paint...anything with that smaller body type and it has room for twenty of them.  As you can see I couldn't fill it up!

I'd love to have you join me for this class!  If you are interested, call the store at (309)585-0409

Supplies Used:
Websters Pages Patterned Paper
My Minds Eye Washi Tape
American Crafts Cardstock

Monday, July 29, 2013

Storage Cabinet from Gina's Designs

 I can't believe we are already smack dab at the end of July!  One of my summer goals was to work on putting together this storage piece and Ribbons Unlimited had the perfect ribbon to help me finish it off!  Organdy ribbon is probably my favorite (and go to) ribbon on most projects.  I love the selection that Ribbons Unlimited has of this gorgeous ribbon!

This storage piece comes from Gina's Designs and you have to assemble each drawer.  I covered mine with various patterned paper from Echo Park's "Beautiful Life" line.


I then tied bows using the Strawberry Organdy Ribbon .  I stuck a large brad through the bow and then put them through the drawer hole.  The ribbon is perfect for being the pull to get the drawers out and adding a feminine and pretty touch!

Supplies Used:
Echo Park Paper "Beautiful Life"
We R Memory Keepers Brads

LinkWithin

Related Posts Plugin for WordPress, Blogger...