Showing posts with label Imaginisce. Show all posts

Wednesday, September 16, 2015

Summer Adventures

I had a couple of Summer Adventures from the summer of 2014 that I hadn't yet gotten documented! I decided to use my Creative Kit from My Creative Scrapbook to do those!  First up is a layout about our trip to Pop's on Route 66 in Oklahoma!

The kit includes some fun ribbons and I decided to use those as stripes on the layout!  I also love the ephemera die cuts that came in it and those really are a focal point on this one!

My second layout is about a trip to Indiana Beach!

This one highlights more of the ephemera die cuts as well as the patterned papers being showcased in the banner!  I really love how this one came together!  And I am so thrilled to have two more layouts created for last summer that feature multiple pictures!

Saturday, September 5, 2015

Back to School Layouts - My Creative Scrapbook Reveal

It's the 5th!  That means it's time to start sharing projects I created using my kits from My Creative Scrapbook this month!   Today I have two to share that are Back to School Layouts and make use of the Creative Kit!
The Creative Kit is full of the new Happy Traveler line from Imaginisce and other fun coordinating goodies from American Crafts, Maya road, Basic Grey and more!  It's great for your summer travel layouts but it's also packed with primary colors, making it perfect for Back to School Layouts!

I thought it would be fun to use the map paper in a big way!  So I did a very simple layout for this one - adding my pictures right in the middle.  I then cut up a pocket page element to use for the Yellow Subtitle. I added my title in a circle around the pictures to really highlight the map and pictures.  A few simple embellishments and that was all this one needed.

This one also was fairly simple aside from the String Art.  I envisioned doing a big 5 in string art in back to school colors.  The graph paper gave me a perfect base for that.  After I traced and stitched my five, I went ahead and filled it in with very random string art.  It is a bold but fun element to add!  I added in pictures and chipboard words.  I colored the chipboard words with gelatos.  My blue one is a little splotchy.  I'm not sure why, other than it was an older gelato.  Nothing I could do to change that so we just used it :).  I also added a few brads and die cut pieces.  I added in handwriten words throughout that are things that he loved in 5th grade. Sort of nice to do this one looking back because then I can include some things that happened last year!


Monday, December 22, 2014

My Last Imaginisce Design Team Project

It's hard to believe that my year with Imaginisce is up!  It was a dream of mine to design for them and I feel so blessed to have had that time.  I decided not to reapply for another term as I have other teams I want to focus more attention on and of course that beautiful family of mine to soak up time with!  So without further adieu here is my very last Imaginisce Design Team project.

Every year my daughter picks out her Christmas dress based on how well it spins out and with the fun elements in this line I thought it was the perfect time to document this sweet memory of her.


I stepped way out of my normal comfort zone and cut out the actual silhouette of her spinning.  Her face in that picture is priceless.  I used the felt garland to create a central focal point for the whole layout and contained all the pieces in there.

The candy cane thickers are awesome but weren't popping the way I like them to against the music background.  I opted to outline them with my black marker to help bring them out even more.


After using a sticker with multiple trees on it I decided to get out my handy IRock tool and add some gems to the top of the trees.  You can never have too much sparkle on a little girl layout and the IRock makes more sparkle always a possibility!

Supply List:
Pebbles: Patterned Paper, Stickers, Garland, Die Cuts
Imaginisce: IRock

Saturday, December 20, 2014

Christmas Pajamas Layout

From the lack of posts on my blog you can definitely tell how busy I have been with Christmas!  I direct our school's Christmas Musical and that has consumed all my free time and energy over the last week.  The little scrapping that I have been doing was done doing CHA work for Core'dinations and Paper House Productions.  Super fun stuff but also Top Secret!

My term with Imaginisce is wrapping up but before it comes to a close I have a couple Christmas layouts to share over the next few days.  Imaginisce did not put out a new Christmas line this year so I am sharing one today using pieces from last year's Christmas line.
Each year my kids get new pajamas for Christmas and some years Grandma even makes them some matching ones.  Trying to get the four of them to sit still and take picture was a task last year and I don't think it will be much easier this year!

Imaginisce always puts out the cutest die cuts and there's always multiples of them too!  Perfect for when you are going for a symmetrical look...which I know doesn't happen too often but it did today!

Supplies Used:
Patterned Paper: Imaginisce
Stickers: Bella Blvd
Die Cuts: Imaginisce


Thursday, December 11, 2014

Silly Cooper Layout published by Paper Crafts & Scrapbooking

I'm so sad that Paper Crafts & Scrapbooking magazine has closed it's doors.  I was honored to be published by them several times.  Today I have two layouts to share with you that are in their last print publication called Photo Pocket Scrapbooking.  I just got mine in the mail a few days ago so it should be available in stores soon, if not already!

This layout was submitted in the basic category.  It makes use of Pocket page elements in a non-traditional way (using them on a layout instead of pockets).  It also needed to have five or less products.  All I used on this was patterned paper, stickers, and wood!

Supplies Used: 
Patterned Paper: Imaginisce & Paper House Productions
Stickers: Bella Blvd, Jillibean Soup, Simple Stories
Wood: Studio Calico

I will be back in the next few days to share the second layout I had published!


Thursday, November 13, 2014

Christmas Publication - Noel Embroidery Hoop

Earlier this year I was privileged to have a Christmas ornament published in the Holiday Cards & More special edition from Paper Crafts & Scrapbooking Magazine.  I love playing with embroidery hoops and paper but this was my first one on a smaller canvas!
Here's the basic directions as to how I did it:
-Take the embroidery hoop apart and using the inside circle.
-Add a quick drying glue or hot glue along the top rim.
-Attach the paper of your choice to it and allow that to dry.
-Trim it down so that you have a circle slightly larger than the hoop.
-Going around the circle - trim notches so that you can easily bend the additional paper onto the side of the hoop.
-Add quick drying glue to the side of the hoop and fold all those pieces down.
-Add your top hoop and your paper should now be secure!

Decorating these is super fun and nice change from the quadrilateral shape we are used to working in!  For this one I added a bold burlap bow and I really liked the effect it had!

Supplies Used:
Patterned Paper: Samantha Walker for Echo Park
Stickers: Samantha Walker for Echo Park & Imaginisce
Gems: Imaginisce
Button: Imaginisce
Burlap: May Arts

Tuesday, November 4, 2014

Paper Doll Christmas Ornaments

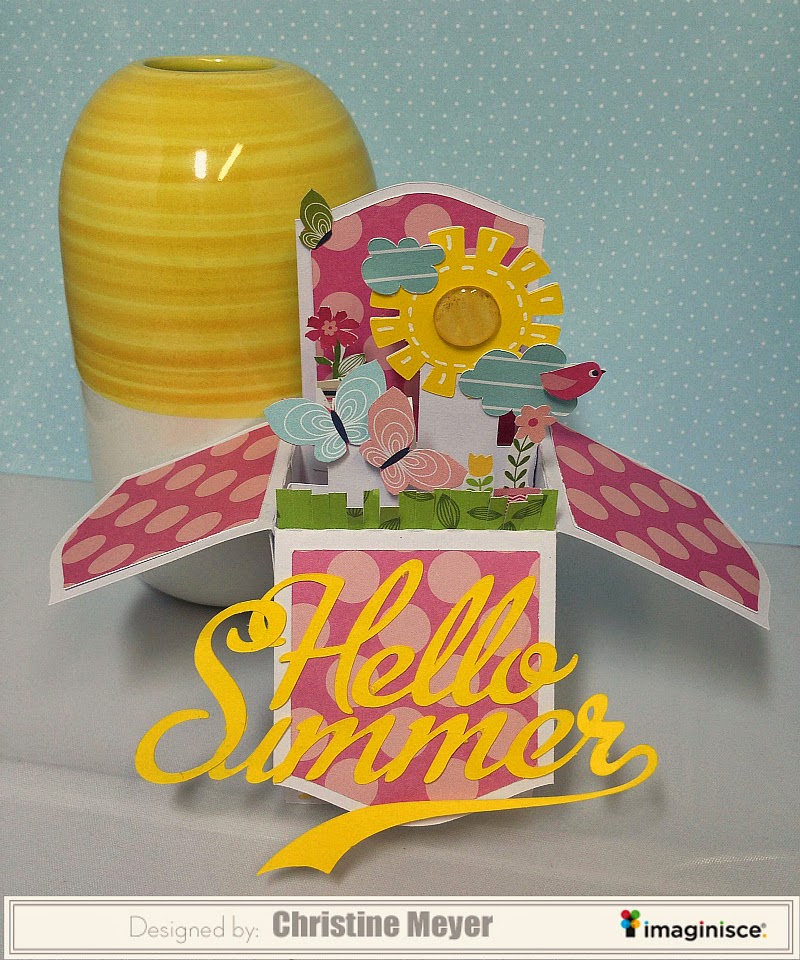
Imaginisce has just released a new line called Family Fun!  Family Fun is such a fun new line that is full of vibrant colors and the perfect designs for crafting family.  I really love the die cut paper dolls and decided to make Christmas Ornaments for each of my kiddos using them.  Each year I give each of my kids a new ornament and they build up a collection - so this will be there ornament for the year!

For each ornament I followed a similar format - the base is a white tag with a coordinating strip of patterned paper on it.  Then I decorated a paper doll with clothes. I also added some coordinating glitter tape and wooden stars. This first one is my little girl!  I also used my IRock tool to add a little sparkle to her bow.


For each doll I added their first initial using the IRock tool.  This was the most time consuming part but I absolutely love how it makes the dolls even more personalized!


Next up comes my oldest son.  The paper doll packs come with all boys or all girls and lots of variety in hair colors and skin tones.  Even with three sons I was able to make mine work from one pack.


My little blondie was the hardest one to create.  Doing a B with the IRock required nice steady hands - but as you can see I got it!  He gives me the biggest run for my money, so it's only fitting that I struggled a little with his ornament right!?! :)


I also got out my cordless glue gun to add the buttons.  I love the light on the end of this glue gun and the fact that I never have to find a plug to use it!


Last up is my middle boy.  His favorite color is green so I had to focus the ornament and his outfit on green.  I can't wait to give these to them and see their excitement when they realize I made them to look like them!

Supplies Used:
Imaginisce: Patterned Paper, IRocks, Die Cuts, Buttons
American Crafts: Glitter Tape, Stars

Wednesday, October 1, 2014

Fall Cards for Imaginisce

Last week I shared some fall themed cards over on the Imaginisce blog.  Imaginisce doesn't currently have a fall line so I pulled from other collections to make these to share! Love it when you can repurpose and still make it work!  My Silhouette Cameo definitely got a work out with these!


I love this Silhouette cut of birch trees - it will definitely make another appearance in winter!  

I added IRocks to the trees and also used an older Imaginisce owl stamp to add to the fall feel.  

This one was a little trickier to create - I had a first attempt that I just wasn't happy with.  The way the leaves lay and making the colors line up is different than anything else I've done.  Finally I settled on sewing the flowy part of the leaf on and I like the look that gave me.  

I love the dimension and flow to this card and it is another awesome cut from the Silhouette Store.  There are a variety of gorgeous ones available there for fall - both new and old!

Supplies Used:
Patterned Paper: Imaginisce
IRocks: Imaginisce
Cardstock: American Crafts

Monday, September 1, 2014

Imaginisce Fall Project

When I think of fall one of the first things that comes to mind is owls.  So today I decided to play around with my I Top and I Rocks and create my own cute owls!  Owls are a fun thing to base projects around because you can cute them up and make them special for adults or kiddos!

Using my electronic die cut machine I cut out an owl pillow box and then created a card to slide inside of it.

The cut file came with eyes and a beak but I decided to use my Imaginisce goodies to make my own!  I created the eyes using the I Top and then adding a white dot topped with a black I Rock gem.  I curled up the feathers and then added I Rock gems to each one.  I love the dimension and sparkle that using the I Rock to a project can add!  I fussy cut a chevron shape out of some patterned paper from the Perfect Vacation line to use for the beak.

I then made a mini card using coordinating colors and products.  I again used a chevron for the beak and I Top eyes.  To create the ears for the owl, I simply used the Clicut Retractable Pen Knife and created notches and then curled the point up.  

These will be fun to fill up with some candy corn and share with someone special this fall!

Products Used:
Imaginisce: Patterned Paper (Perfect Vacation), Clicut Retractable Pen Knife, I Rock, I Top

Thursday, August 28, 2014

She makes me Happy - Imaginisce

As you can tell from this post, I've been playing with my Imaginisce a lot this week.  I decided to grab a couple of happy pictures of Lucy and just let them lead me in colors and inspiration!
I wanted to use the bold castle paper for a background but knew I needed to find a way to settle the rest of the layout to bring the eye in.  I decided to create a square with a bolder color and contain the focus of the layout to that.  I added some triangles to the two corners to bring in an extra color and help ground the whole thing more.  I added lots of words - both the main title and then big and little words that describe her.  stickers, buttons, and gems are the embellishing touches.  By keeping everything to the center I was able to complete the whole layout in about 45 minutes!

Supplies Used:
Patterned Paper: Imaginisce
Stickers: American Crafts, Simple Stories
Gems: Imaginisce
Buttons: Imaginisce

Tuesday, August 26, 2014

So Big, So Little - Little Boy Layout

Today is my little guy Cooper's first day of preschool.  As I was sorting pictures last week, I realized that I had not scrapped these cute ones of him yet from back when he was one.  I pulled out my stash of Imaginisce patterned papers and die cuts and went to town! 
I built the whole thing around the shirt that he is wearing - pulling in those shades of blue.  After layering several papers to create my base, I matted and added my pictures where I wanted them.  I then used embellishments and stickers to create some little clusters to frame the pictures.  The funniest thing about these pictures is that I have some similar ones to do of my next son - at least I got these done before I forgot which was which :)  

Supplies Used:
Patterned Papers: Imaginisce
Die Cuts: Imaginisce
Stickers: Pink Paislee, Simple Stories, American Crafts
Cork: Studio Calico


Wednesday, July 30, 2014

Sympathy Card

I do not enjoy making sympathy cards.  I rarely have them even on hand because it just makes me sad!  But a friend has recently suffered a loss and I felt compelled to send a personal note.  I pulled out some Imaginisce goodies, dies from Poppy Stamps, and my go to for sentiments SRM Stickers.

Sympathy Card by Christine Meyer
I cut out the striped paper first - planning to fit my sentiment onto the lighter blue lines.  I then backed that with some light blue floral paper and added those to the card base.  Both of those papers come from the Welcome Spring line from Imaginisce!  I then die cut the butterfly and leaves and added them.  I surrounded those with blue gems and some white I Rock gems. Simple but pretty with lots of dimension and texture to it!  
Supplies Used:
Patterned Paper: Imaginisce
Gems: Imaginisce
Sticker: SRM Stickers


Thursday, July 17, 2014

Giving the I top a Workout!

On Tuesday I was up over at Imaginisce with a layout that showcases the awesome I Top tool!

Using the Little Princess line, I looked at the pink paper and knew I wanted to build a design off of that.  So I did some folded circles in the center of each diamond and then created my own brads to use in the corners.  I added a few gems and butterflies to keep it from being too monotonous.  Having a detailed and busy bottom portion of the layout allowed me to keep the top nice and simple - adding just a little patterned paper and a die cut. 

Supplies Used:
Patterned Paper: Imaginisce
Die Cuts: Imaginisce
Gems: Imaginisce

Wednesday, June 25, 2014

4th of July Lantern - Imaginisce


The 4th of July is a great day to put out some fun decor and Imaginisce has some papers in the Perfect Vacation line that work just great for creating those projects!  Today I have a patriotic lantern to share with you that is featured over at Imaginisce.


I used a cut file to create this lantern that you can add a little electric tea light to for the evening hours.  Because the file comes with stars think of all the possibilities you could create with it!  You could do a baby shower decoration or a Christmas decoration all by using different lines from Imaginisce!


I cut the base in a dark blue patterned paper and then did the stars in some red paper.  I decided to just do USA in plain white so it wouldn't get lost in the patterns.  Some Red Irocks were the perfect embellishment.


To add some embellishing to the lantern I created a couple of Brads using my ITop and the same red patterned paper I had used earlier.  Not too overwhelming but adds some nice dimension and makes my embellishments one of a kind!

Supplies Used:
Imaginisce: Patterned Paper (Perfect Vacation), Itop, Irock
American Crafts: Cardstock

Friday, June 13, 2014

Wedding Card Inspiration

A good friend of mine has a sister getting married this weekend and I made a card for her to use for it!  I tried to incorporate some of the wedding colors to add a personal touch!
Can you tell I love that Mosaic Die from Top Dog Dies???? I decided to use it once again!  I then added Black Irocks from Imaginisce to the center of all the flowers.  I used a die from Poppy Stamps for my leaves and then topped the whole thing off with the perfect SRM Sticker!  This wedding sticker set comes in black & white with some gray also.  Perfect for adding to any color to personalize it for the wedding you are going to!

Supplies Used:
Sticker: SRM Stickers
IRocks: Imaginisce
Dies: Top Dog Dies & Poppy Stamps
Cardstock: CutCardstock

Friday, June 6, 2014

Imaginisce Summer Box Card

Box cards seem to be creeping up in popularity and I have been anxious to try one out!  My favorite thing about them is that they can be a card or they can really cute decor for a party table!  I used a cut file from Lori Whitlock the Silhouette Store to create the base for mine!


I decided to use the papers from Welcome Spring because they have a great summery feel to them too!

From the side you can get a better view of the various layers of sunshine, clouds, and butterflies.


I used all patterned paper except for doing the sunshine - it needed to be solid and bold.
Believe it or not these cards actually fold down and fit into an A2 envelope.  Well they would if you don't put a giant title on them - I'll need a larger envelope.  Imagine receiving something like this in the mail!

Supplies Used: 
Imaginisce: Patterned Paper (Welcome Spring)
American Crafts: Cardstock

Thursday, June 5, 2014

Guest Designing for Top Dog Dies

I am so excited to be guest designing for Top Dog Dies today! 

Top Dog Dies is a new online store that offers their own brand of wafer-thin and steel-rule dies, along with dies from brands you already know and trust, including My Favorite Things, Lawn Fawn, Taylored Expressions. Savvy Stamps and Cheery Lynn Designs. Top Dog Dies is also the leading U.S. retailer for Tattered Lace, a new line of intricate dies designed by British designer Stephanie Weightman.

Now on to my projects!  For my cards I made use of my Imaginisce goodies - which combine beautifully with Top Dog Dies!

The A2 Flower Mosaic Mat is a gorgeous die!  I was so excited when I opened my package and found it in there - I quickly made a cut with it and snapped a photo to send to a fellow scrappy friend!  I love to paper piece and I did that on all three of my projects.  I also used the Leafy Flourishes Set on this one and the Pretty Petals Set.  I absolutely adore the flowers from the Pretty Petals Set!

Supplies Used:
Patterned Paper: Imaginisce
Die Cut: Imagnisce
IRocks: Imaginisce
Cardstock: CutCardStock

This one again features the A2 Flower Mosaic Mat but with a more colorful background!  You can find out more about how I created it on the Top Dog Dies blog today!

Supplies Used:
Patterned Paper: Imaginisce
Stickers: Jillibean Soup
Burlap: Little Yellow Bicycle
IRocks: Imagnisce
My last project also makes use of the A2 Flower Mosaic Mat! As soon as I got it I knew I wanted to do a rainbow style theme with it.  It worked beautifully and is striking don't you think!?!  Lots more details on this one on the Top Dog Dies blog today also!

Supplies Used:
Patterned Paper: Simple Stories
Stickers: Simple Stories
Die Cuts: Simple Stories

How about a GIVEAWAY?

 Top Dog Dies is doing a  guest designer giveaway for the whole month of June! The winner will receive $50 worth of exclusive dies from Top Dog Dies (their choice!).  You can find the giveaway here!

Thanks so much for stopping by today!


Thursday, May 29, 2014

Sketchy Saturday - On Thursday!

Well I know it's Thursday but we're doing Sketchy Saturday early this week because my sketch has been up on Imaginisce all week and is ready to be played with!  Here's the sketch!

And here's my interpretation!  This was my first time to really play with the new Little Princess line!  I love the colors in this line and that they include purple!  It is so hard to find purple in patterned papers!  This line was the perfect match for pictures of my little girl from the first day of Kindergarten!


I stuck pretty true to the sketch right down to the polaroid frames on my pictures.  Instead of going to a die cut polaroid I simply extended my matte on the bottom of the pictures and got a "faux" polaroid look!  Because I went with a solid purple base, I decided to keep my triangles the same pattern and do a lighter patterned paper for them.  

I used a bolder paper for my polaroid bases to really make sure my pictures pop!

Imaginisce paper die cuts beautifully and I used lots of die cut flowers, stems, and words throughout as accents on the layout.

Supplies Used:
Patterned Paper: Imaginisce
IRocks: Imaginisce
Dies: Top Dog Dies
Chipboard: Studio Calico

Sunday, May 18, 2014

Wedding Shower Card - Imaginisce

Yesterday I had the privilege of attending a wedding shower for a dear friend.  I had just received some new Top Dog Dies in the mail and decided to go ahead and make her up a card using those and the new Little Princess line from Imaginisce.

The gorgeous lace background is a steel die from Top Dog Dies!  It comes in A2 size so you don't even have to worry about cutting your paper the right size - it does it for you!  The additional pink flowers are also from Top Dog Dies.  I got those for my blog hop earlier in the week and have been making use of them quite a bit!

Supplies Used:
Patterned Paper: Imaginisce
Cardstock: CutCardstock
IRocks: Imaginisce
Ribbon: CutCardstock
Dies: Top Dog Dies

Tuesday, May 13, 2014

The Twinery & Top Dog Dies Blog Hop

It's an exciting day here for me as I am blog hopping for the first time with The Twinery team. This week we are doing a joint hop with the team from Top Dog Dies. It began yesterday - so if you didn't already see it you should definitely check out the first post here! Throughout the hop you will find projects created that use both our baker’s twine and dies from Top Dog Dies.
You should have arrived here from Tiffany's blog
If you didn't you'll want to head back to the beginning and check out all the blogs!


Today I am going to show you how I put a little different spin on a traditional card.  I decorated a glassine bag and slid my notecard into it.  
The glassine bag comes from SRM Stickers.  I decorated it using papers from Imaginisce's newest line "Little Princess".  I used the Top Dog Dies Pretty Petals Die Set with those papers and cut out several flowers.  I did a bow with double strands underneath my Imaginisce button.  To create that I glued down a regular bow and then I ran the twine thru the button for my second strand. I added some border stickers from SRM Stickers for a little added pink! I used the Vintage Alphabet Die from Top Dog Dies to create my sentiment.

 The top of my note is decorated with some additional flowers and a small banner. I only wrote on the part that would be hidden inside the bag.

Thanks so much for stopping in today!  
Your next stop on the hop is Jaclyn's Blog!

LinkWithin

Related Posts Plugin for WordPress, Blogger...