Monday, March 9, 2015

DIY Paper Craft Crosses

Paper House Productions has a lot of great Christian themed products - including papers and stickers. I decided to create some crosses to add to our cross wall at home and use their beautiful pieces to create them!

Over the years my husband and I have collected a lot of crosses - so many that they almost fill up one of our walls in the kitchen.  It’s a regular topic of discussion both at the dinner table and amongst guests.  Many of the crosses we were gifted, some we’ve picked out on our own, and some I’ve made.  

But I’ve never made a paper craft one before!  Each year I try to make a couple that I can pass on to the kids when they leave the house.  Because I have four kids, I thought I’d make four crosses of Paper House products.  Eventually I’ll pass them on to the kids but for now these four are being added to our wall!


For each cross I used a paper mache base that I picked up at a local craft store.


I then used Mod Podge to attach a piece of paper to it.  The Papers came from the Live by Faith Paper Pad and coordinate perfectly with the stickers!


I then added lines of gems to each cross.

Decorating each one was easy - I used a mixture of the new cardstock stickers, some 3D stickers, and even some puffy stickers.  

I’m excited that this was not a hard project to do! Sure I had to wait for things to dry but beyond that it was easy because of the beautiful collection (and a few little extras here and there that I had to work with).  It was super fun to hang them and let everyone try to figure out where the new crosses were!

Supply List:

Crosses - came from Hobby Lobby and are a paper mache

Sunday, March 8, 2015

Simple Cards from My Creative Scrapbook

If you know me, you know how much I enjoy creating cards too!  So today I thought I'd share a little more on the details of the cards I made with the Creative Kit from My Creative Scrapbook this month. I love this kit and all the goodies from Simple Stories!

As I was shuffling around the Insta square pieces that came in the kit I noticed the diagonals on the squares.  I knew then and there I wanted to do a grid design with different colors matching up.  I backed that with a wood grain paper to give it a solid base.  I then added some punched hearts with star stickers.  A popped up sentiment and it was good.  Pretty simple and striking!

This second card was even more simple.  I cut down one of the 4 inch Insta Squares and used it in the center of the card.  I then just added stickers and chipboard pieces at opposite corners.  A little faux stitching and it was done.  I love that I was able to use up some odds and ends to create a bright and cheerful card!

Saturday, March 7, 2015

Changing up Patterned Paper to make it yours - My Creative Scrapbook

***If you are looking for the My Creative Scrapbook Blog Hop you can find it here***
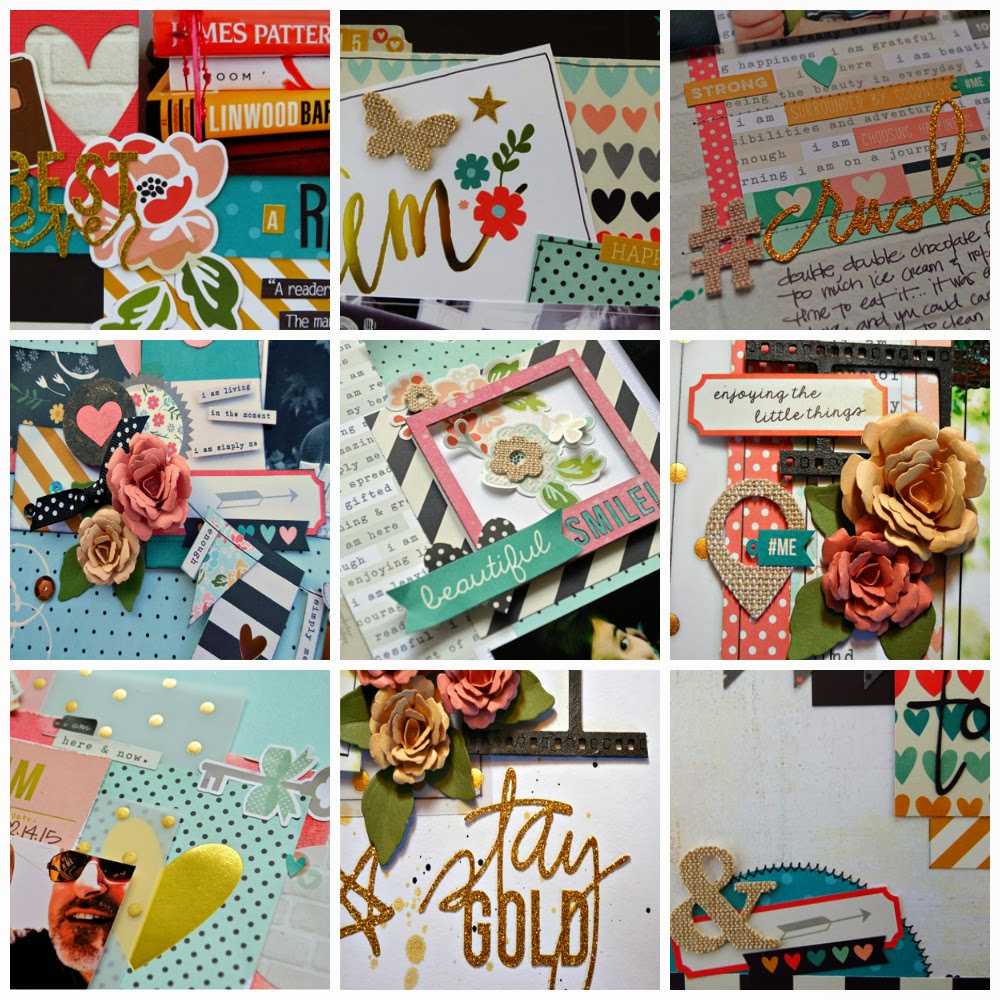
I already share with you all of my projects from the Creative Kit from My Creative Scrapbook this month but I wanted to take a few posts and share some up close details on them!  The papers in this kit are just amazing! Simple Stories did an awesome job on this line (as usual!) and so today I am going to share a couple layouts that show how I changed up a couple of already awesome papers a little to make my layouts more one of a kind.

This page is a twist on the trendy sunburst.  The sunburst was actually a part of one big sheet of patterned paper and I cut it out and then shortened each of the bursts.  I absolutely loved the paper in it's original form - but the goal is to show you different ways to use the kit and put your own twist on it - so that's what I did here.  By doing this I also created more space for words and embellishments without things being too busy!

I absolutely loved the striped paper that makes up the base of this layout!  So I found a way to use it in a big way.  By adding the white strip vertically it helps calm down the color a bit and focus the eyes in on to the picture.  I kept my embellishments simple.  The center of each flower is a chipboard piece from Blue Fern that comes in the kit.  I then just used stickers to create my petals.  I like the modern and graphic feel that it gave the whole layout and again, makes it one of a kind.

The last layout I am going to share today shows another way to alter that patterned paper.  By doing some fussy cutting, I was able to create some dimension to my ruffles.  You'll be able to see a full tutorial on that soon on the My Creative Scrapbook Blog!


Friday, March 6, 2015

DIY Chalkboard Clipboard

***If you are looking for the My Creative Scrapbook Blog Hop it is the next post down***

SRM Stickers added a new product to the store this week! Chalkboard Markers!!! Not just ones to write on Chalkboards but ones to make chalkboards too! I love the versatility of chalkboard!  Today I am going to  show you how you can make that boring and intimidating To Do list a little more fun by using Chalkboard Markers.
diy chalkboard clipboard - SRM Stickers

My To Do list is always long but there are always certain things that are top priority and I am also liable to forget.  So I decided to use the new Chalkboard Markers to create a shorter - in your face list that can hang in my kitchen!
diy chalkboard clipboard - SRM Stickers

I started with an inexpensive wood clipboard.  I then used the Easy Chalkboard Marker and just colored it.  I did two layers to ensure it was thick. I used some letter stickers to trace the "to do" part with Bistro Flurescent Chalk Markers.  You could totally freehand that if you are braver than me :)  I then created lines and boxes using the Bistro Chalk Markers and the 6 mm Bistro White Chalk Marker.  Because I was in a bright and cheery mood when I created this, I doodled some flowers using both the Fine Tip and 6 mm Flourescent Bistro Chalk Markers. I love that depending on my mood, I can change up the doodling or even just leave it plain and simple!  


Lastly you add your to do's and then enjoy checking them off!  

Thursday, March 5, 2015

My Creative Scrapbook Blog Hop & March Kit Reveal


Welcome to the My Creative Scrapbook March Kit Reveal Blog Hop! 
My Creative Scrapbook is thrilled to celebrate the reveal of our beautiful March kits with an inspiration-filled blog hop complete with beautiful PRIZES!  The design team has prepared a spectacular assortment of projects for you, so be sure to visit each blog to soak up all of the inspiration.

Several prizes are up for grabs!

*** One lucky winner will receive a March Limited Edition kit! ***

*** One lucky winner will receive a March Main kit! ***

*** One lucky winner will receive the assortment of chipboard below, courtesy of our fabulous friends at Blue Fern Studios! ***


>>>>> Here is how you can win <<<<<

Simply visit each of the participating blogs and leave comments along the way. You’ll find the links to the participating blogs at the end of this post.  The prize winners will be randomly chosen from the comments!

Presenting the My Creative Scrapbook March kits:


Here is what I created with the Creative kit: 


All that and would you believe I still have stuff left over to do more!?!  This kit stretches big time!  I'll be going into detail on these projects more over the next several days so if you like them, make sure to pop back by!

My Creative Scrapbook is currently accepting new members!
Subscription information can be found here: http://www.mycreativescrapbook.com/kits.htm

Before you go, remember to leave a comment to be entered into the prize drawings!

We would love it if you would follow us on Facebook, too.

The blog hop ends on Sunday, March 8, 2015 at 11:59 PM Eastern Time.
Winners will be announced on the My Creative Scrapbook blog.

The next stop on the blog hop is Angel Rodrigue: http://scrappalace.blogspot.com/ 's blog.

Here is the complete blog hop lineup:
Mariusz Gierszewski: http://scrapkiart.blogspot.com/


Wednesday, March 4, 2015

St. Patrick's Day Crafts Roundup

St. Patrick's Day is so much fun to make crafts for!  I love the rainbows, the green, the gold, every last bit of it!  
So today I thought I'd share some fun projects I have found around the web and some of my own personal favorites!  
Check out these nine fun projects!  
The links to each one are located below the picture!

Lucky Leprechaun Hat Card by Christine Meyer
Keep Looking Up Subway Sign by Christine Meyer
St. Patrick's Day Treat Bag by Christine Meyer
Lucky Rainbow Card by Christine Meyer
Lucky Me Mug & Card by Kathy Skou
Shamrock Card by Suzanna Lee
Lucky Cake Layout by Suzanna Lee
I am So Lucky I have You Card by Marcia Dehn-Nix
Lucky Dog Layout by Cathy Harper

Aren't these fun paper crafts!?! Check out more details on each of them by following the links!


St. Patrick's Day Treat Bag

Between chocolate gold coins, skittles, and gold rolos there are so many fun options for making up treats for St. Patrick's Day and Core'dinations has the perfect supplies to help you decorate those treat bags.  Today I am going to show you how I used some Darice Metal Dies to create a bag topper.
stpattystreatbag
Treat Bag Topper Supply List:
Treat Bag Supply List
Now on to how to make this simple topper!
Step 1: Cut out the three layers for the topper using the metal dies and the three different green cardstocks and layer them on top of each other.  You will have to offset one of the scallop ones to add some length (otherwise they land on top of each other).   Add some white dots along the edges to create a border.

Treat Bag Closeup 1
Step 2: Use a border punch to punch out some gold cardstock and add that to the top.  Punch out a gold heart and layer that with the Green Shamrock foam stickers to the topper along with a heart (that came out of the shamrock)

Treat Bag Closeup 2
Step 3:  Fold the top part of the topper over a bag filled with candy and secure with hot glue or some other strong adhesive.

Treat-Bag-Closeup-3


Tuesday, March 3, 2015

Treasure This Time Tuesday: Capturing the Two Year Old

Two is one of my favorite ages so far.  I know that makes me in the minority for a lot of moms! Two years olds change so much from month to month - this little guy is probably the easiest to have new material on! I took pictures this month that weren't posed - just sneaking up on him to catch his true personality.  Thankfully he sat still for a few minutes this month :)


I recently picked up the new Jack line from Echo Park knowing that I needed more boy supplies for scrapping.  Creating this feature each week and being forced to make sure I am doing boy stuff regularly has definitely made me realize my boy supplies are a little low!  Good excuse for new stuff or to get real creative I guess!  

Because I am running low on time this week I went very clean and simple this week.  I added layers of paper behind the pictures to bring in some of the colors he's wearing and other masculine colors.  I then just simply created two clusters of stickers and other embellishments.  My journaling went right below the picture with a few of the little details that I want to remember about Bo from February.  I love a complicated and detailed layout but I also love something that comes together clean and simple and quick!

Supplies Used:
Patterned Paper: Echo Park
Stickers: Echo Park
Enamel Dots: Simple Stories
Wood: Studio Calico

Sunday, March 1, 2015

My Creative Scrapbook - Sneak Peeks!

It's SNEAK PEEK time!

This is my first official month as a design team member at My Creative Scrapbook and you are gonna just love the kits this month!  We are so excited to reveal the beautiful lineup of kits that we have coming your way for March. The full kits are going to be revealed on the 5th but in the meantime, our designers have prepared some sneak peek eye candy for you.

Have a look at our March Main Kit:


Here are a couple of March Main Kit layouts!
by Michelle McDonald

by Brenda Cazes

******************************

Have a look at our March Creative Kit (this is the one I played with!):

and a March Creative Kit layout!

by Christine Meyer

******************************

Next... our March Limited Edition Kit:


and a couple of March Limited Edition Kit layouts!

by Maiko Kosugi

by Michelle McDonald

******************************

Have a look at our March Album Kit:


and a look inside the March Album!


by Angel Rodrigue

******************************

As always, this is only a little sneak peek at what's coming in the March kits. The full kit reveal is coming up on March 5th... be sure to check back then!

Don't forget to reserve your kits.
Please visit MyCreativeScrapbook.com for more information.

I'll be back to share all my projects with you on the 5th!

LinkWithin

Related Posts Plugin for WordPress, Blogger...