Showing posts with label christmas card. Show all posts

Monday, December 11, 2017

Buffalo Plaid Shaker Card

Do you love the look of Shaker Cards but find them a little intimidating to make?  I always thought they would be really challenging.  BUT once I discovered the Keepsake Envelopes from Scrapbook Adhesives by 3L, the creation of Shaker Cards got a lot easier.  Today I am going to show you how I created a simple Buffalo Plaid Shaker Card featuring Keepsake Envelopes.
Buffalo Plaid Shaker Card Featuring Keepsake Envelopes
I knew I wanted to keep things simple with a white background because I wated to be able to incorporate the trendy Buffalo Plaid patterned paper I had on hand.
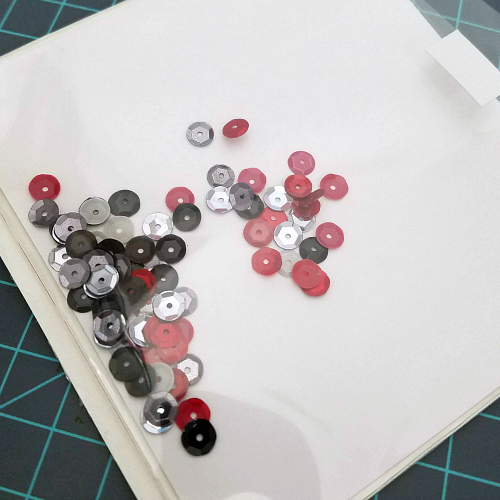
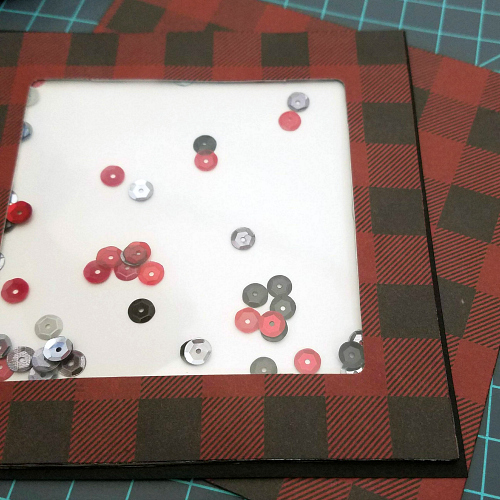
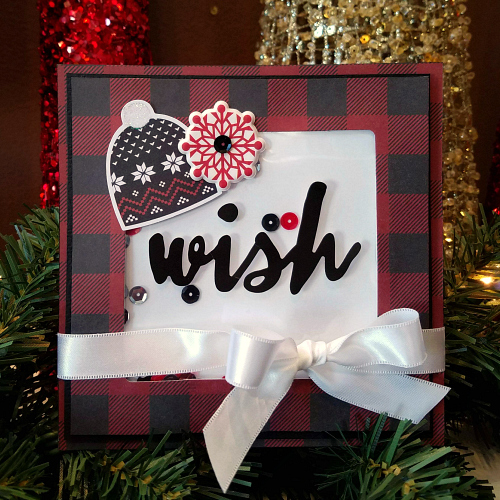
I started things off by adding white cardstock into this envelope. It's the biggest envelope in the pack measuring 5 inches X 4.6 inches.  I then added sequins into it.  I did spend some time debating whether to use a patterned paper in lieu of white.  Ultimately I thought that would make things too busy so I stuck with white.

I cut out a 5 inch by 5 inch frame and used my E-Z Runner® to secure that to the front of the Keepsake Envelope.  Next I peeled the adhesive backing off of the Keepsake Envelope and adhered it to black cardstock.  I cut the black cardstock to be a 5 1/4 inch square so it would act as a mat for the shaker.
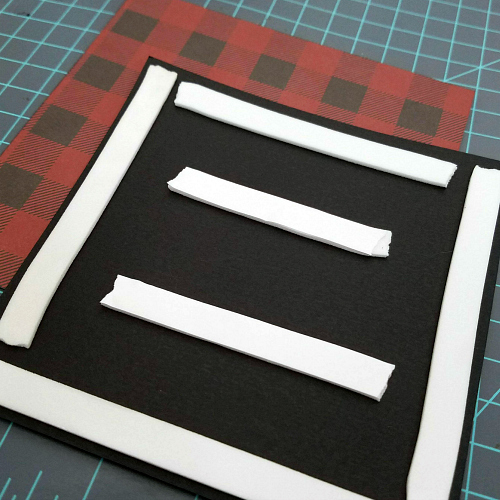

Following that I pulled out my Crafty Foam Tape and used it on the perimeter and center of my black cardstock. I attached that to the base of my card which was already covered in the same Buffalo Plaid patterned paper. Although I thought it might not work to have them up against each other, I actually like how unique it looks!
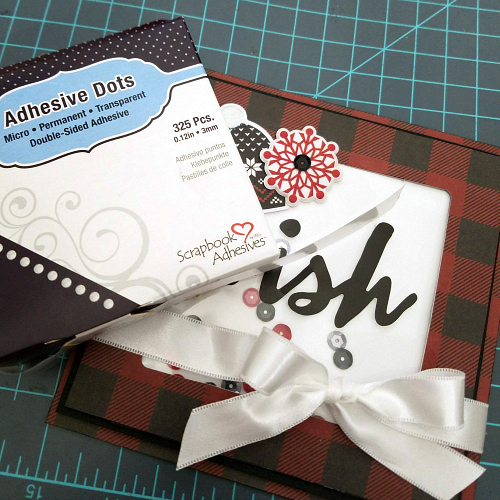

Lastly I added embellishments - a sticker sentiment and a couple stickers along with a ribbon bow.  I secured the ribbon with a couple of Dodz Adhesive Dots Mini  to make sure it would stay in place.
Thanks so much for joining me today.  Click on any of the Affiliate Thumbnails below to check out the supplies!  Thanks for your support!


Monday, December 21, 2015

Christmas Cards with My Creative Scrapbook

One of my favorite things to do with the ends of my My Creative Scrapbook kits is to make cards.  Before the week gets away from me, I wanted to share some Christmas cards that I made with the odds and ends from my kit this month from My Creative Scrapbook!

These first two come from the Creative Kit


These next three come from the Main Kit - oh the gold foiling is so fun!


You can't go wrong with scraps and making cards - it's such a great way to use up all your supplies!  Give it a whirl next time before you bury the stuff into a drawer or pitch it!

Wednesday, December 2, 2015

Ornament Shaped Christmas Cards - Free Cut File!

JustNick is having an amazing holiday giveaway! 
I am kicking off Day 2 of our 14 Days of Holidays cut file giveaways! Each weekday from December 1-18, 2015 we will be giving away a FREE cut file for that day only!
Today's Free Cut File is Ornaments
  I love making shaped cards and these worked perfectly for that!
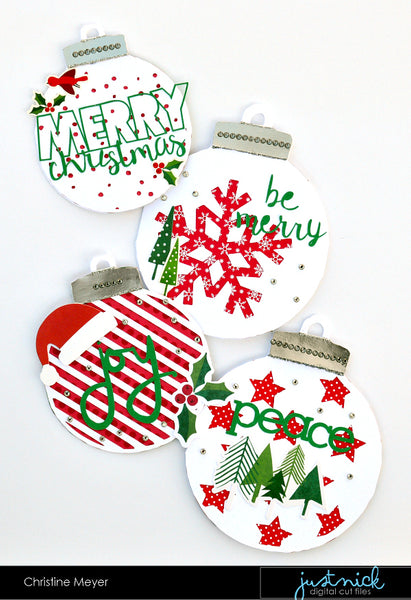
I made one card with each ornament shape available!  I love that there are four fun options!  In case you are wondering how I made them into cards here's a little detail into that:
First off I rotated the ornament so that it was upside down.  I then chose to create a mirror image below it. This makes it so that I now have two of the ornaments.  I then put the hook part of the ornaments close enough together that they are slightly overlapping and weld them together.  You could also do this and mirror the ornament to the side and weld sides together instead of the hook.  Either way you end up with a really cute card! If you have questions I am happy to help explain further!
Now on to a little detail about each card and some of the additional cuts that I used! First up is the Merry Christmas Card.
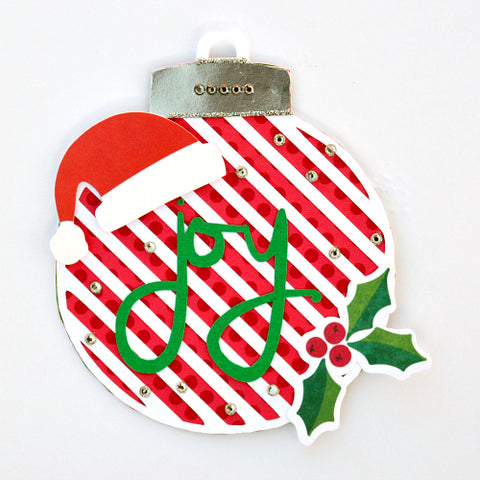
For every card I stuck with a similar base start.  I had a white ornament and backed it with red patterned papers.  I then added a silver metallic paper for the top part of the ornament and added some silver stickles and silver gemstones.  I also cut all my sentiments in green.  Doing these things helped simplify the process a bit.  I then added some stickers or die cuts to each card to fit the personality of the cut.  For this one I added the Merry Wishes file for my sentiment. I like how it is open and airy just like the original file itself.
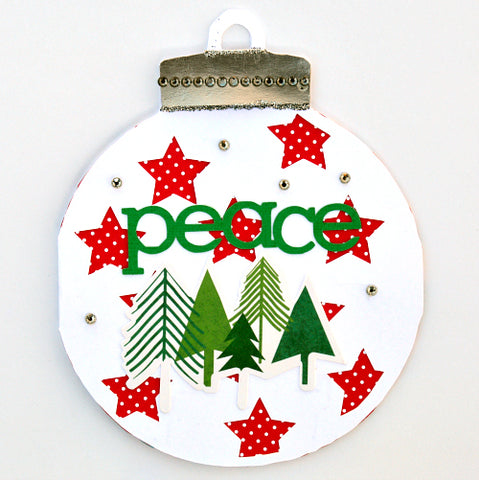
I'm a sucker for stars and adding a peace sentiment to this from the Holiday Sentiments just seemed right for a night scene.  
A santa hat tops off the word "joy" which also comes from the Holiday Sentiments set.
Last up is a Be Merry card with a sentiment from the Merry Wishes set. We can't wait to see how you are adding JustNick cut files to your Holiday projects too!
Today’s design – Ornaments- is yours for FREE today only!
Just enter code: ORNAMENTSFREE at checkout to get this design for free.
This code is only valid until midnight CST on (December 2nd, 2015).
No purchase necessary. Happy Holidays from us to you!


Saturday, November 21, 2015

Paper House Productions Holiday Blog Hop

Paper House Hoilday Blog Hop

This weekend, the Paper House Productions Design Team is hosting a Holiday Blog Hop! We have tons of Holiday inspiration for you from the team members.

We can't wait to share all their projects with you. To celebrate the hop, we're giving away a $25 PaperHouseProductions.com Gift Card! That's $25 to spend on ANYTHING on the Paper House website!
Paper House Gift Certificate
Paper House Holiday Blog Hop
Holiday Blog Hop Designers
Christine Meyer ***You Are Here***
Karyn Schultz ***Head Here Next***
Paper House Productions***Go Here to enter the contest***
Make sure to hop through each designer on the list and leave a comment on their blog post to be eligible! When you're done, just hop back here and let us know! The hop will be running all weekend, so you have until Sunday at 11:59pm EST to get your entries in! Happy Hopping, and Happy Holidays!
And now for what I have created.  I did something a little different - I made three cards all for Christmas and all based on the same sketch from Create Magazine this month!
This first one is a Shaker Card because who doesn't love getting those!?!  It uses patterned paper from the Colorways Rouge collection and some Die Cut Stickers too!

This one also uses the Colorways Rouge collection but is a very clean and simple approach.  Half a doily and some beautiful stickers is all it took to make this fun little one!  I like how different it turned out!

On this one you can see the return of the Winter Wonderland Die Cut as well as more Colorways Rouge paper.  And of course some of my favorite 3D stickers from Paper House which are so perfect for adding dimension!  

I know you have lots of hopping to do so I won't keep you any longer!  I'd love to hear which card is your favorite before you hop on over to my talented friend Karyn's blog!  Have a wonderful and relaxing weekend!

Tuesday, November 3, 2015

Dimensional Christmas Card

I love to use folding techniques to add something special to my cards and layouts.  Today I am going to share with you how I did some folding using the new Colorways Rouge Collection from Paper House Productions to create a Christmas card.

To make this card you will want to gather the following supplies: a 1 ½” circle punch (or use an electronic cutting machine to cut several), an A2 size card base (4 ¼” X 5 ½”) folded vertically.  One sheet of the Rouge Sculpted Entry cardstock from the Colorways Rouge Collection, the Reason for the Season 3D Stickers, and some ribbon.  Here’s a brief video on how I folded the circles on the card - you can access the video over at this blog post.

As you can see it isn’t very complicated.  I think one of the trickiest parts is picking out a good paper to do it with!  This one worked really well!  As you choose papers you have to watch out for stripes and things that may look like they need to line up.


With the second side of my paper choice being tone on tone, it made it work really well for the inside squares that show up!  


For the last part of the card I added a sentiment that is in the shape of a half circle.  I like the way it plays off the other semi circles in the card.  Just about any 3D sentiment can work really well for this project!  It also helps cover up any rough edges.  Top the whole thing off with a pretty bow and you have a striking and elegant card!

Sunday, December 14, 2014

Core'dinations Christmas Card

I have had a blast playing with my Core'dinations cardstock this Christmas season.  I have done a lot with cards and today I have one more to share with you!  This one involves sanding and embossing and a lot of layering! It was featured last week at Core'dinations as part of the Core'dinations/Stampendous/Dreamweaver Blog Hop!

Christmas Card Supply List:
Here's the details on how I created it:
Step 1: Emboss the Chalk Core with the Greetings Embossing folder and sand with Sand It Gadget to bring out the chalk.
Step 2: Emboss a small piece of the Scarlett Red cardstock to get a little bit of the embossing folder border and add it to the white tag.
Step 3: Sand the Spotted paper and add it and Scarlett Red cardstock to the base of your card.  Top with the embosssed Chalk Core piece.
Core-Christmas-Closeup
Step 4: Stamp your sentiment on a white circle cut from Core Basics 80Lb Cardstock.
Step 5:  Die cut a deer head from Gemstone Cardstock.  Add all the pieces to the tag using dimensional adhesive to pop some up.

Monday, December 8, 2014

Doily Christmas Card: SRM Stickers

I love doilies and am always on the lookout for new and clever ways to incorporate them.  Today I have a Christmas card to share with you that I made for SRM Stickers using their doilies and some flair from Bossy Joscie.
I've been wanting to try my hand at making a doily tree for awhile and this was the perfect opportunity.  I folded the 4 inch SRM doilies to a triangular shaping, getting smaller as I went up the tree.  Topping them with Bossy Joscie Flair was the perfect final addition.  

A white sentiment from We've Got Your Sticker - Merry set helped pull the whole thing together - I love how SRM's white stickers just pop!  And of course the whole base is Core'dinations cardstock and one of their fabulous tags!  

Supplies Used:
Cardstock: Core'dinations
Stickers: SRM Stickers
Doilies: SRM Stickers
Flair: Bossy Joscie

Monday, December 9, 2013

One Samantha Walker Doily: Two Different Projects

My Silhouette Cameo has been getting a workout lately.  Today I have a couple of Christmas home decor projects to share with you that feature the same doily cut from Samantha Walker, but used in two different ways.


For my first project I used the doily in a simple and subtle way, playing up the monochromatic match of the cardstock to the metal doily.  I found this metal doily at IKEA - it is meant to be a candle holder and they carry it in a variety of sizes.  I loved it knew I wanted to use it for a wall hanging.  I added the word "Hope" which is also a cut from Samantha Walker.  I also added the golden pearls around the inner edge.  That was a long, tedious process...but it definitely added the finishing touch I was going for!  

While this piece can work for a holiday home decor piece, it can also work year around!
  
The second project uses the doily in a more complicated way!  I used it as the focal point on this card and weaved some ribbon through the spokes of part of the doily.  Apparently I was in the mood for tedious work...because this was another longer task!  Again, I think it was well worth it though!  I secured the ends of the ribbon and then tied a separate bow using the same ribbon.  This covered up the ends!  I also added an additional twine bow that was a match for the kraft background!    


Some pieces from Teresa Collins "Santa's List" line are the final touches to the card.

Supplies List:
Patterned Paper: Teresa Collins
Ribbon: CutCardStock
Chipboard: Teresa Collins
Cardstock: CutCardStock
Pearls: Want2Scrap

Friday, December 21, 2012

Little Yellow Bicycle "Once Upon a Christmas Cards"

Once I got thru with my "Cycling Team" gig, I decided to play a little more with the "Once Upon a Christmas" line and came up with a few more cards.   
 I did a whole bunch of layering on this one using the paper poinsettia & star tags.

I am always on the lookout for how I can create ruffles on a card...this patterned paper worked perfectly for it!  I did lots of fussy cutting to create the ruffles but I think it was well worth it!

Little Yellow Bicycle did an amazing job with this line and I am so glad I had the chance to do lots of playing with it!

Monday, November 14, 2011

Tis the Season

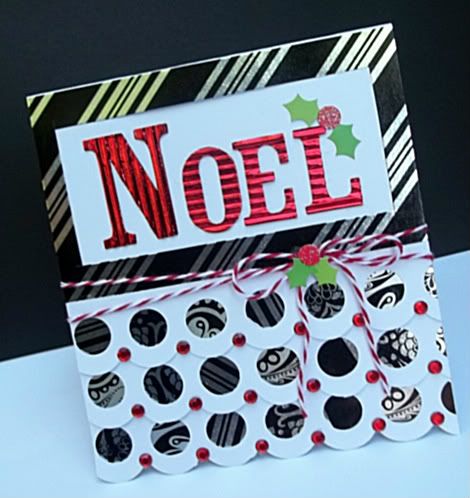
Okay this one was super hard to photograph with all the metallic!!!  I used my favorite border punch again and created some ruffles using more of that fabulous Black Tie line from Momenta.   The challenge at Practical Scrappers was to use some old stash for a Christmas project.  I used some really really old holly stickers to add some extra Christmas kick to it.  I also finally used up some really old red bling! And of course it wouldn't be a project from me if it didn't have Bakers Twine from The Twinery on it! 
Supplies Used:  Letters and Paper from Momenta, Gems from Hobby Lobby, Bakers Twine from The Twinery, Stickers from Doodlebug Design

LinkWithin

Related Posts Plugin for WordPress, Blogger...