Showing posts with label Leaky Shed Studio. Show all posts

Tuesday, October 14, 2014

Disney Pocket Page

Today is my last post for Leaky Shed Studio - I have really enjoyed my 6 months with them!  One of my favorite things that they make are all the great Disney themed pieces. I am going to share how I incorporated them into a pocket page today.
I love pocket pages because they leave lots of room for you to be as creative as you want to be or have time to be - you can go big or go simple  Today I added lots of personal touches to mine.

For my title pocket I used both Memories with Ears and the Mouse Frames to make it personal and have some awesome dimension that chipboard provides.

I also thought it would be fun to create a shaker pocket using the bigger sized Mouse Frame and some coordinating sequins.  I glued the frame to the back of the pocket page.  The shaker box is going to be visible on both sides of the pocket page so that means the back side gets to be Disney too!

Supplies Used:
Patterned Paper: Simple Stories
Chipboard: Leaky Shed Studio
Sequins: Teresa Collins, American Crafts
Enamel Dots: Simple Stories

Saturday, October 4, 2014

Disneyland Layout

I love to scrap Disney photos and am always on the lookout for some new items to play with.  Did you know that Leaky Shed Studio has some different items perfect for doing your Disney photos?  Today I am hosting their blog with this Disneyland Layout!

This clean and simple layout came together fairly quickly and I love that I had the chipboard "Disneyland" to add as my title.  I misted it with black mist to give it some color and then added it to the layout for some different texture and dimension.  Later this month I will be sharing a Disneyland pocket page using more of the Leaky Shed Disney goodies!  The rest of this layout is made up of pieces from Simple Stories "Say Cheese" line which is themed towards Disney projects.  I recently got my hands on it and LOVE it!  

Supplies Used:
Patterned Paper: Simple Stories
Chipboard: Leaky Shed Studio
Twine: The Twinery
Stickers: Simple Stories


Tuesday, September 30, 2014

Converting Raw Chipboard to fabulous Gold!

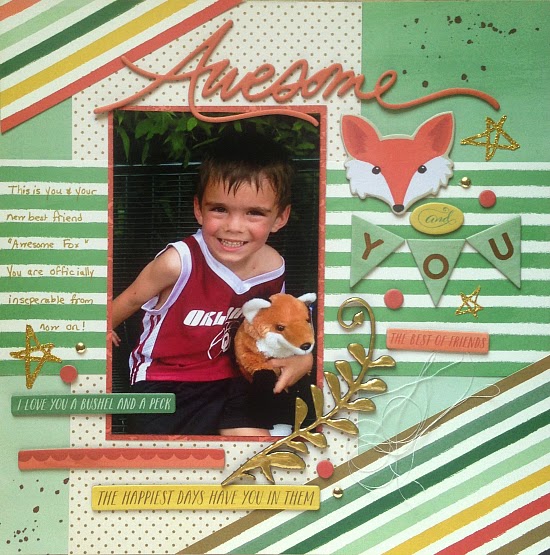
  As a clean and simple style artist, I often struggle with what to do with raw chipboard.  A lot of times I leave it alone or just paint it white.  But today I stepped out of my comfort zone a little bit while still staying true to my style.  For today's layout I covered my raw chipboard using Ranger Perfect Pearls.

This layout needed a perfect gold accent and the Fern Flourish was just what I was looking for!  I needed something with some curves and flow to it to break up all the straight lines.  

To cover it with Perfect Pearls, I simply worked slowly straight from the bottle.  Slowly letting liquid out and fill it in more as needed.  It dried beautifully and I love the shimmer it adds without being to feminine.

Supplies Used:
Patterned Paper: My Mind's Eye
Stickers: My Mind's Eye & Heidi Swapp
Chipboard: Leaky Shed Studio
Mist: Heidi Swapp

Tuesday, July 29, 2014

Disney Princess Pocket Page

I am up over at Leaky Shed Studio today and I decided to create a pocket page about Lucy's princess time at Disneyland.  I take sooooo many pictures when I go to Disney with my kids - pocket pages are the way to get them documented without spending a year doing layouts!  I had so much fun putting this together and building a big scene throughout the layout!

Disney Princess Pocket Page
 I had a plan laid out in mind with the castle and title but I knew I needed something to add as a focal point for a picture of her!  I ended up cutting out a picture of her and adding the Circle Arch Doily Frame around her picture.

Disney Princess Pocket Page
  After painting it white, I cut it so that it would fit in two pockets.  I love how it adds some different texture and dimension to the whole thing and really brings the eye to her picture first!

Do you have Disney Pocket Pages to share?  I would love to see it!  Link me up here or share with me on my facebook wall!

Supplies Used:
Patterned Paper: Dooodlebug Designs, We R Memory Keepers
Stickers: Simple Stories, Doodlebug Designs, SRM Stickers
Chipboard: Leaky Shed Studio


Tuesday, July 15, 2014

Little Boy Layout

I am sharing a project today over at Leaky Shed Studio that features pieces from both Leaky Shed and Altered Pages!


I had some dragonfly goodies to work with from Altered Pages and decided to combine those with the chipboard dragonflies from Leaky Shed Studio.  Since I have three sons, dragonflies are perfect for summer fun with a more masculine feel.  

I opted to leave the chipboard in it's natural state because it brought in one more color from my base patterned paper!  And again it enhances that masculine feel.

I used pieces from the Dragonfly Dreams Muse Kit that included the cardstock dragonflies, the blue textured paper, the green paper, and the tag!  It's a neat kit because you can go a lot of directions with it - but for me a layout just jumped out because of the colors!

Altered Pages Supplies Used:

Leaky Shed Studio Supplies Used:

Other Supplies Used:
Patterned Paper: We R Memory Keepers
Stickers: Heidi Swapp

Thursday, June 26, 2014

You make my Heart Sing - Leaky Shed Studios

I am up over at Leaky Shed Studio today!  I'm a music teacher so when I saw the musical staff border I was very excited!  I debated using it on a layout but decided I really wanted to make a card with it!

One measure was a perfect fit for an A2 card!  So after using my black mist to color it, I cut it off there and added it to the top of the card.  I followed the curve of it to line the bottom with patterned paper.

I then topped the whole thing with heart embellishments and stickers to go with the color scheme.  It comes together to make a perfect card for celebrating someone be it their birthday, congratulations, or just encouraging them along!

Supplies Used:
Patterned Paper: Teresa Collins
Stickers: Simple Stories
Enamel Dots: Teresa Collins
Mist: Heidi Swapp

Tuesday, May 27, 2014

SRM Challenge Blog - Happy Birthday Card

 Had a little time to play so I thought I would join in the SRM Challenge Blog this month.  The challenge was to create a Happy Birthday project.  
I used bakers twine, a sticker sentiment, and little hearts (that I fussy cut from a border) from SRM Stickers. I also used washi tape, enamel dots, heart pearls,  and patterned paper from Doodlebug Design. And there's that gorgeous kite again from Leaky Shed Studio!  Love that chipboard piece!


Tuesday, May 20, 2014

All American Layout

I am up today at The Leaky Shed Studio blog!   Since Memorial Day is coming up I decided I wanted to create a layout with an Americana feel to it!  The Picket Fence was the perfect accent for that!
I painted it white but didn't work on perfect painting - I thought a worn feeling added to the Americana feel! I also love that it is a full 12 inches long making it perfect for a layout!   My whole layout was build around the fence with that as the anchor.  The layout tells the story of my little boys watching school kids out the window (we live across the street from a school).

Adding a little sticker banner to it allowed it be accented a little bit without detracting too much from the fence itself!  This fence would also be cool painted black and used in a halloween style layout or brown for a fall layout - such a versatile piece!!!

Leaky Shed Studio Supplies Used:

Other Supplies Used:
Patterned Paper: Pebbles Inc
Die Cuts: Pebbles Inc
Stickers: Pebbles Inc, American Crafts

Tuesday, May 6, 2014

A New Design Team!

Today is my first post as a design team member for Leaky Shed Studio.

As soon as I saw the kites, I fell in love!  They are so fun and whimsical and I knew I wanted to do my first project with them!  Today I have two different cards to share with you! I am also linking these up at the current issue at Paper Issues - Mum's the Word
For this one I just used the outline piece and backed it with patterned paper.  Combining it with other spring elements makes for a fun whimsical card perfect for sharing with a friend!

I used acryclic white paint to color my kites.

For this card I went more clean and simple.  I back each quadrant of the kite with a different patterned paper and then also did the same on the card making sure they didn't match up.  It's a quick technique that allows you to share some patterned paper that you love but keeps the focus on the awesome kite!

I went a little less heavy on the paint on this one allowing the chipboard to show thru a bit - it gives a little bit of the worn wood feel that a kite might have.

Leaky Shed Studio Products
Summer Kites

Other Supplies Used:
Patterned Paper: Pebbles
Die Cuts: Pebbles
Washi Tape: Pebbles
Ribbon: CutCardStock

LinkWithin

Related Posts Plugin for WordPress, Blogger...