Showing posts with label justnick. Show all posts

Wednesday, January 20, 2016

My Creative Sketches - January Sketch

It's time for the new sketch contest at My Creative Sketches and I squeezed in some time to play along this month!  Here's what the sketch looks like this month:


And here's what I created based on the sketch!

I used up the remains of my January Creative Kit and added some Doodlebug supplies to it! I decided to scrap one of my daughters pictures in her Christmas dress from this year. I am perpetually behind on Christmas pictures so I thought since it looked so nice with these papers why not go for it!  I also added in some JustNick cut files!  I'm kind of missing that team already!  Both the "cherish" title and the frame on the picture come from there.  I fussy cut that row of flowers/circles at the bottom of the layout.  That was a task!  I also used more of that washi tape from the kit as my top and bottom borders!  Love that stuff, I hope Pebbles makes more!!! We hope you'll play along this month and link up your sketch interpretation too!

Supplies Used: 
Patterned Paper: My Creative Scrapbook January Creative Kit
Stickers: My Creative Scrapbook January Creative Kit & Doodlebug
Wood: Jillibean Soup
Ephemera: My Creative Scrapbook January Creative Kit
Washi Tape: My Creative Scrapbook January Creative Kit
Pearls: Darice
Cut Files: JustNick


Tuesday, December 29, 2015

Final Project for JustNick

Today is my last post for JustNick it seems perfect to be sharing a layout about Remembering! I really enjoyed my time on the team but with the new year comes changes to my schedule and design team commitments and I decided not to reapply at this point.  I'm always cautious about taking on too much!  As we enter into a new year in a few days - I wanted to document some special pictures of my kiddos. I also wanted to a post that highlighted some of my favorite things about JustNick's files - I loved working with her background files, I loved working with her word files, and I definitely loved her circles!  This layout incorporates all three!
Just Nick has so many great background files and I always enjoyed trying to find a unique twist on them. One of my favorite layouts was one where I did string art - that was a massive undertaking. This time I decided to do string art again with the Scribble Circle Background but on a much smaller scale.  Just a little in between the middle scribble circles.
I also really enjoyed working with all the word/text files that JustNick has to offer - so there was no better choice for my big bold title than the Remember word set!
I am so thankful for a fun ride with JustNick's awesome and trendy cut files!
Supplies Used:
Patterned Paper: Doodlebug Design
Stickers: American Crafts & Doodlebug Design
Enamel Dots: Doodlebug Design


Wednesday, December 2, 2015

Ornament Shaped Christmas Cards - Free Cut File!

JustNick is having an amazing holiday giveaway! 
I am kicking off Day 2 of our 14 Days of Holidays cut file giveaways! Each weekday from December 1-18, 2015 we will be giving away a FREE cut file for that day only!
Today's Free Cut File is Ornaments
  I love making shaped cards and these worked perfectly for that!
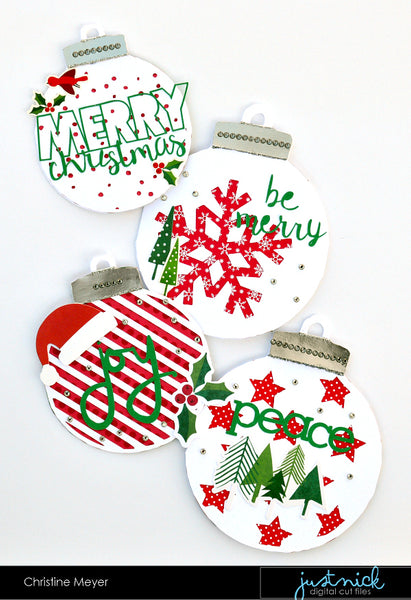
I made one card with each ornament shape available!  I love that there are four fun options!  In case you are wondering how I made them into cards here's a little detail into that:
First off I rotated the ornament so that it was upside down.  I then chose to create a mirror image below it. This makes it so that I now have two of the ornaments.  I then put the hook part of the ornaments close enough together that they are slightly overlapping and weld them together.  You could also do this and mirror the ornament to the side and weld sides together instead of the hook.  Either way you end up with a really cute card! If you have questions I am happy to help explain further!
Now on to a little detail about each card and some of the additional cuts that I used! First up is the Merry Christmas Card.
For every card I stuck with a similar base start.  I had a white ornament and backed it with red patterned papers.  I then added a silver metallic paper for the top part of the ornament and added some silver stickles and silver gemstones.  I also cut all my sentiments in green.  Doing these things helped simplify the process a bit.  I then added some stickers or die cuts to each card to fit the personality of the cut.  For this one I added the Merry Wishes file for my sentiment. I like how it is open and airy just like the original file itself.
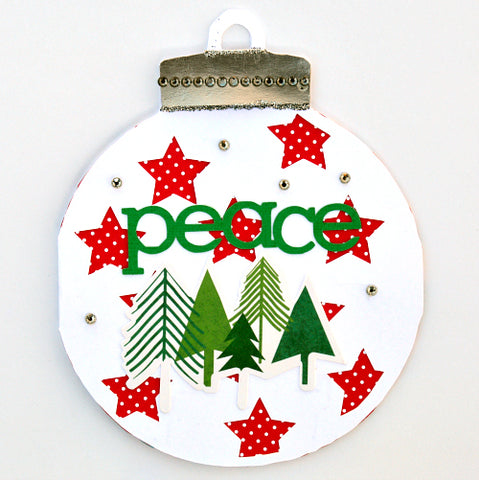
I'm a sucker for stars and adding a peace sentiment to this from the Holiday Sentiments just seemed right for a night scene.  
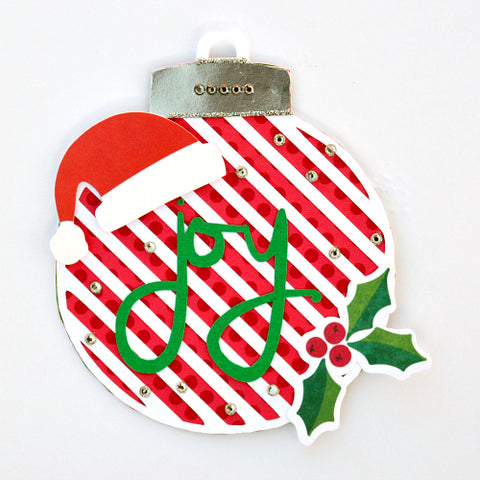
A santa hat tops off the word "joy" which also comes from the Holiday Sentiments set.
Last up is a Be Merry card with a sentiment from the Merry Wishes set. We can't wait to see how you are adding JustNick cut files to your Holiday projects too!
Today’s design – Ornaments- is yours for FREE today only!
Just enter code: ORNAMENTSFREE at checkout to get this design for free.
This code is only valid until midnight CST on (December 2nd, 2015).
No purchase necessary. Happy Holidays from us to you!


Wednesday, November 4, 2015

Stitching on a Star Background

I am just loving all the new files that JustNick is cranking out.  She has so many fun files that balance trends and good graphic design!  As a mom with three boys, I definitely have a thing for stars.  So when I saw the newest Star Background 2 from JustNick I was thrilled!  I had been wanting for awhile (like since February) to write about my youngest son's new bed and bedtime routine.  A star background gave me the perfect excuse to finally record that memory!
I am big on trying to record memories of moments that I know I will otherwise forget - this is one of those! I started with cutting out the Star Background 2 and then used that as an overlay over white cardstock.  I knew I needed to use something to ground the pictures and opted for the Stitched Circle.
Instead of leaving all of the stars white - I added some of them back into the overlay.  They are still there but a little more discreet and I like the way that breaks things up a bit!
I also went through and added in some star string art....connecting the points in the stars.  Again, I just did that to some.  The rest were left white or got a little wooden star added.  This is a really fun background that you are going to love - think of all the possibilities from camping to love to sports!

Supplies Used:
Cardstock: Core'dinations
Patterned Paper: Simple Stories
Wood: Studio Calico
Stickers: Simple Stories

Wednesday, October 21, 2015

Too Cute To Spook: Using Multiple Cut Files on a Layout

Using lots of cut files on a layout doesn't have to be scary or complicated and this week we were challenged at Just Nick to use at least four!  It took a little more precise planning than I usually do but it wasn't too difficult to do!  I think JustNick files definitely make it easier to do this as she has so many words 
 
I started off using one of my favorite files the Brick Circle Background.  In this case I used it as a way to pull in some extra color and texture to my background.  That extra orange really helps my pictures pop off the page!
The Handcut Letters 2 are so unique and kind of fit with my "tiger" title because of the stripe!  The bats come from the brand new Spooky Stuff file.  I folded their wings up to give them some added dimension.
The Doodle Frames were perfect for mounting over my pictures and adding another pop of color. He certainly is Too Cute to Spook and I think he will be just that again this year!  Have fun experimenting with multiple cut files - you never know how great they can look until you give it a try!

Tuesday, October 6, 2015

Sparkling up your Cards

I love to look at the details of things and try to find a way to put my own spin on them.  Today I am going to show you how I did just that with a couple of JustNick files and cards!  I added my own sparkling details to the cards!
As I was looking at the Retro Sqaure Background file I thought it would be neat to do some kind of a shape with the grid you see in it!  I have a stockpile of rhinestones so that was the perfect medium to use!  After figuring out the shape of the heart I started building from the top and bottom (so it would be close to center) and filled in from there.  I considered putting the rhinestones inside the little squares but opted for the vertices instead.
I cut out a second copy of the Retro Square in pink and filled in a border using the inside pieces.  I also cut out a coordinating sentiment from the new Card Sentiments 2 Set.
I have a soft place in my heart for scallops - I love how they look on cards and will go to them whenever I have the chance.  This card uses the Scallop Background.  After cutting out the scallop background I attached it to a piece of vellum. I absolutely loved the way the Shine Bright Accent piece from Paper House Productions (it's in the new Gatsby Collection) looked on top of the ruffles!
I then added a rhinestone to the center of each scallop.  I love how sparkly this turned out but I also think it would be really neat with little pearls!  

Tuesday, September 29, 2015

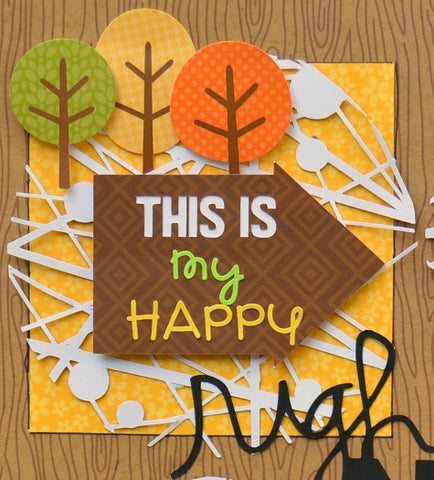
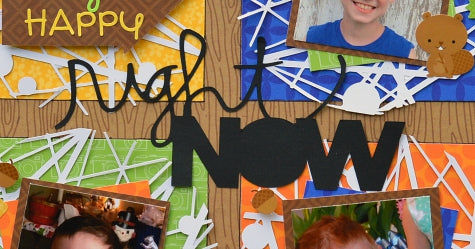
This is My Happy!

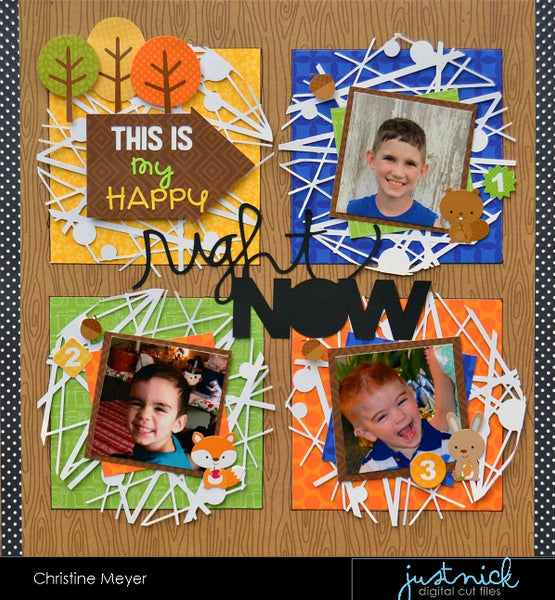
This week's theme over at JustNick Studio is Boys2Men!  Perfect for me as I have three boys! Doing projects about boys takes a little different approach and sometimes some added creativity to make the supplies at hand work.  JustNick has tons of awesome files that are perfect for boy layouts!
The String Circle Background looked fun and I decided to incorporate that into a grid design.  Because it is a busier file I decided to cut it just in white so it wouldn't overwhelm everything.  I think this approach helps it add a nice punch to the layout - especially up against the vibrant colored squares! I busted out my Doodlebug Design Stash to use throughout the layout!
I used one of the boxes to house part of my title and the Arrow Set 1 was perfect for adding some uniqueness to my title. I wanted to give the whole layout a fall feel without making it completely about the season.  I added in some tree stickers as well as some little woodland critters and acorns.
I just love how the white string art circle pops against the blue!
My title needed to be something bold to stand out amongst everything else.  The fonts on this Right Now Script were perfect and combined with black had the pop I was hoping for!  
Stay tuned the blog all week for more masculine inspiration from the team!


Tuesday, September 1, 2015

Birthday Boy - a JustNick Layout

The creativity just keeps flowing with the fun backgrounds from JustNick!  Today I am going to share with you how I used the Twilight Zone Background on a birthday layout!  I seem to be most drawn to her circular backgrounds - which I suppose makes sense because I love including circles on my layouts!
I always get a little nervous when I cut something this detailed!  It takes awhile to cut and if it gets messed up, who wants to start over.  The good news is this cut perfectly on my very first attempt!  I had thinner cardstock so I set my blade at a 3 and it didn't tear.  
I backed each line of circles with a 3/4 inch strip of patterned paper. That fit perfectly without any overlapping.
To help draw the eye in even more to the pictures I did some hand-stitching.  I connected three circles with stitching and it really changed the look of the design!  Because of all the busyness I kept things very simple from there, just adding a few stickers and a title.
We got some brand new designs over the weekend - make sure to check them out and snag them to play with this week!

Tuesday, August 4, 2015

String Art Layout & Giveaway Winner

I'm up today with a new layout at JustNick.  I played with the string art technique for this one and just love how it turned out!
I cut out the Sunburst Background File with white cardstock.  Then I backed each sunburst with orange and yellow patterned papers.

I then created string art between the rays (more details on the JustNick blog) and stitched around each sunburst.  This was very time consuming but totally worth it for the end result.  I did it in the car while we were roadtripping....made the time pass much more quickly!  

Supplies Used:
Patterned Paper: Doodlebug Design
Buttons: Doodlebug Design
Floss: SRM Stickers
Stickers: Doodlebug Design

Now on to the big winner from my Giveaway of the SRM Gift Certificate!
Congrats to: Heidi Ingalls!  Heidi email me at practicalscrappers@gmail.com and I will get you all set up!


Monday, July 27, 2015

Fancy Floral Mom layout

It's floral week  at JustNick and have there are some great projects to show you!  There are so many great floral options in the store - make sure to take a peek! For my post today I decided to use the Fancy Floral background and create a layout around it. I absolutely love how it is several different kinds of flowers!
Adding patterned papers to the back of cut file backgrounds is so trendy.  It takes a little bit of a time commitment but the end result is always fabulous!  There are a couple different ways to add the papers: you could cut out file multiple times using your different papers or just add to the back of your file and cut around them.  I've done both ways depending on how intricate the file is.  This one wasn't too bad to cut around - but if it was super intriciate I would piece it together!
JustNick also offers tons of great word files and I love to use those for titles!  For this layout I used a couple pieces from the Word 2 file.
One of my favorite things about using background cut files is that they don't require a whole lot beyond them.  Simply add some words and a few simple embellishments and  you can be done! Make sure to check in on JustNick this week to see more fabulous floral creations!

Friday, July 3, 2015

Boys of Summer Layout

I am up with a project at the JustNick blog today! Summer is in full gear and it's the perfect time to share how fabulous the Swiss Cheese Background file is for making those summer layouts! I absolutely love how this turned out with pics of my cutie pie boys!
There are a tons of ways you could use this file but I used it to have kind of a sunrise/sunset feel to it using lots of colors.  That was easily achieved by just adding a striped patterned paper behind the file.
I cut the file on a cardstock that was already embossed and it still cut super easy!  There are also tons of options for titles in the store and today I used the Summer Words file to cut out "summer."
I added some letter stickers to personalize the title to my layout and it was done!  One of the things I love about using background files like this is that you don't have to do a ton more to the layout - they give you a really fantastic base to start with and you can just add a little more!  As you can see I added a big circle and stitching to create a sun and a few little wood pieces and words - there is not a ton to this!  
Files Used:
Supplies Used:
Cardstock: Core'dinations
Patterned Paper: Simple Stories
Stickers: Simple Stories

Tuesday, June 23, 2015

You Are MyHappy

Today is my first post as a design team member for JustNick! I am absolutely loving playing with her cutfiles and I know you will too!  As soon as I saw the You Are My Happy Cut File I knew I wanted to use it for a layout and exactly how I wanted to place a picture with it! The titles just look like they are meant to have a picture sit on them!
  
I used patterned paper and the Brushstrokes cut files to create my background for both the picture and as anchors in others spots on the layout. I love the look of paint but I am not brave enough (or patient enough) yet to add too much of it to my layouts, so this is the perfect solution!
The brushstrokes made a great matte for my picture and also a great base for my title and journaling!
Have you tried out any JustNick files yet?  She's got a ton of trendy things in her store! Make sure to share it with me if you do create something!

Tuesday, June 9, 2015

Sunshine Shaker Card - JustNick Design Team

I'm so excited to be joining the team at JustNick and working with her trendy and fun cutfiles!  Today is my introduction over on her blog!  Here's the first project I made - hop here for all the details!


Supplies Used:
Patterned Paper: Echo Park & Bella Blvd
Cardstock: Core'dinations
Buttons: Doodlebug Design

LinkWithin

Related Posts Plugin for WordPress, Blogger...