Showing posts with label My Minds Eye. Show all posts

Monday, December 7, 2015

My Creative Scrapbook Main Kit Layouts

Hi Crafty friends!  Today I am going to share with you the layouts I made using the Main Kit from My Creative Scrapbook this month!  The kit comes with supplies from My Mind's Eye, Photo Play Paper, and Echo Park!  It's classy and beautiful and so much fun to play with!

This one was so fun to create!  The kit includes a vellum sheet with words written in gold foil.  I fussy cut those and used them to create a tree.  I then added coordinating splatters  to fill up the white space a bit!

 There's some more of those fussy cut gold foil words but in a much more traditional manner! I really loved the gray and red plaid paper and wanted to incorporate it in a layout.  I enjoyed adding in the punches of color to liven the whole thing up - particularly adding hte embellishments to the black and white photos.  And aren't those glittered poinsettias just beautiful!?!

My last main kit layout also has a lot of detail to it but is focused more on the gray side of the kit and steps away from the gold foil.  I cut out the zig zags and then added some hand stitching to those.  Tucking my pictures behind them added a whimsical touch.  I also used lots of round embellishing to help break up the solid lines in the bottom half of the layout.

Later this week I will share some cards with you that came from this kit too!

Thursday, September 17, 2015

First Glasses Layout

My Oldest Son recently got glasses for the first time.  On the same day he got them my kit arrived from My Creative Scrapbook and I decided to use some of the more masculine elements in it to create a layout with pictures from that day!
There were a lot of elements in the patterned papers that had diamonds to them so I decided to play off of that and do some fussy cutting and stitching.  I always love how an overlapped picture looks - so I added in that element as well!  The original picture had colors that didn't even come close to matching the papers included so it definitely needed to be converted to black and white.  The gold accents, glasses, and flair all came together to add a good combination of different textures and interesting elements.

Monday, September 14, 2015

Little Girl Layout - My Creative Scrapbook

Today I have a couple of little girl layouts using the Main Kit from My Creative Scrapbook.  The colors in this kit are rich and beautiful and perfect for sophisticated girl layouts!
For this one I did a lot of fussy cutting!  I cut out the banner and I also cut out the butterflies.  I wanted to really highlight some of the different elements available in the kit as well as the beautiful patterned papers.

This one also contains lots of fussy cutting!  To decorate the top of the layout I used a variety of hearts - some punched, some stickers, and some fussy cut.  I added in some gold sequins to highlight the gold foiled paper from the bottom and layered several different elemnts from stickers to brads!


Wednesday, September 9, 2015

Music I Love - My Creative Scrapbook

It's been a while since I have added a new layout about myself.  Considering the main line in this month's Main Kit from My Creative Scrapbook is called "My Story," it felt appropriate to do one with it!  This month I did the topic of Music I Love.  It could have said Songs I love, but I didn't have enough of the letter S left in my alphabet ;).
I like all kinds of music but my favorite is Christian music and hymns....so the list may be very unfamiliar to you if you don't know that genre well.  Some of the songs have deep personal messages that I can/have related to and some are just beautiful worship pieces.  And there's one Taylor Swift one thrown in just for kicks.  

I printed out my text and it's not big enough to read!  Live and learn....so here's what it has on the list:
He is Good by Nichole Nordeman, Hold on to Jesus by Erin O'Donnell, I Will Carry You by Selah, He's my Son by Mark Schultz, Held by Natalie Grant, Greater by Mercy Me, Turn Your Eyes upon Jesus (the hymn), Oceans Deep by Hillsong United, Worn by Tenth Avenue North, Jerusalem the Golden (the hymn), Don't you Ever Grown Up by Taylor Swift, Now the Light Has Gone Away (the hymn), Grant them Peace by Fernando Ortega, How Beautiful by Twila Paris, Sent Forth by God's Blessing (the hymn), We Praise You and Acknowledge You, O God (hymn), It is Well with My Soul (hymn) - Any of those your favorites too?  

The layout itself was pretty simple.  I loved the quilt styled paper and wanted to use it in a bold way - so I added yellow cardstock down the center to settle it down a bit.  A circle and some banner stickers surround the picture along with some pocket pieces and embellishments!  Very clean & simple but still busy with the different patterns involved!

Don't forget to check out all the kits this month from My Creative Scrapbook!

Tuesday, September 30, 2014

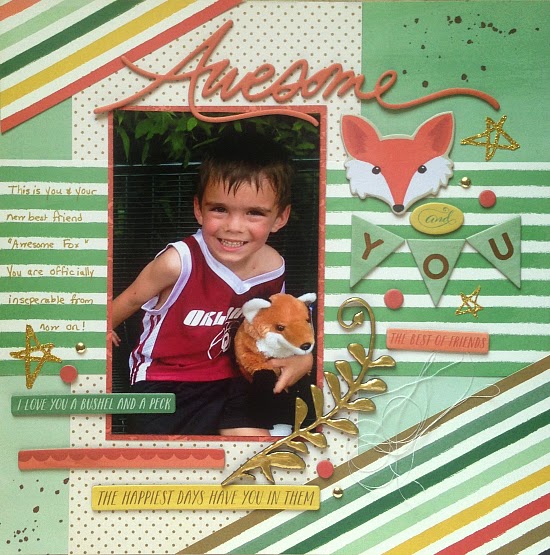
Converting Raw Chipboard to fabulous Gold!

  As a clean and simple style artist, I often struggle with what to do with raw chipboard.  A lot of times I leave it alone or just paint it white.  But today I stepped out of my comfort zone a little bit while still staying true to my style.  For today's layout I covered my raw chipboard using Ranger Perfect Pearls.

This layout needed a perfect gold accent and the Fern Flourish was just what I was looking for!  I needed something with some curves and flow to it to break up all the straight lines.  

To cover it with Perfect Pearls, I simply worked slowly straight from the bottle.  Slowly letting liquid out and fill it in more as needed.  It dried beautifully and I love the shimmer it adds without being to feminine.

Supplies Used:
Patterned Paper: My Mind's Eye
Stickers: My Mind's Eye & Heidi Swapp
Chipboard: Leaky Shed Studio
Mist: Heidi Swapp

Monday, May 26, 2014

Happy Memorial Day!

Happy Memorial Day to all my American friends!  Today is the day we stop and remember all those who have served to protect our freedoms!  We are truly a blessed nation and have much to be thankful for!
To create this banner flag I simply added stripes of washi, a simple SRM sticker sentiment, and some stars and twine!

This one was a little more complicated.  I created the stripes with washi tape and then also punched some stars out from the washi tape.  I added those making sure to line all the stripes up.  A couple of cute die cuts from Pebbles and a bow were the finishing touches.

I hope everyone is enjoying this long weekend with family and friends!

Supplies Used:
Washi Tape: Doodlebug Design, Queen & Co, My Mind's Eye
Die Cuts: Pebbles Inc
Wood: Studio Calico
Stickers: SRM Stickers

Tuesday, April 29, 2014

Kiwi Lane Designs and My Mind's Eye Layout

How in the world is it already April 29th?  I volunteered to do a second posting for Kiwi Lane this month because I was having sooooo much fun playing with My Mind's Eye and this months new templates!  Having three boys the new "Now and Then" line is just perfect for me!  

Today I thought I would incorporate both my Silhouette Cameo and some doodling with my Kiwi Lane templates!
  
Creating a background using mist and Kiwi Lane templates
Before I go any further I have to give a shout out to the uber talented Stephanie Buice - she inspired my background!  It doesn't have anything to do with the Kiwi Lane Templates so I didn't talk about it there - but I wanted to give it a moment here :).  She has done several layouts recently that have this painted background with stripes, etc...she has used a variety of mediums to create hers.  I went with what I had - which was mists.  I just used my mists and dry brushed a line across diagonally.  I started with the darkest and then went from there.

Now on to the Kiwi Lane stuff :)
First off I used two different patterned papers and cut out the word HAPPY on my Silhouette.  I made sure to leave space between each of them so that I could use my balloon template to cut them out.
You can do this with any die cutting machine!


I then traced a balloon around each letter and cut them out.  

The other way I used my templates was to create another layer to my background.   Once the mist painting was dry I used my Cloud Template and traced clouds throughout. I made sure to overlap them and added some loops for a whimsical touch.

Now you may be wondering, why go to all that work for a background?  I didn't have a paper on hand that coordinated without being too busy.  So when that happens...I take to making my own.  One thing is for sure - it is one of a kind.

Have you ever used your templates to create one of a kind layouts?  That's one of the best things about Kiwi Lane - you can make things personal!

Kiwi Lane Templates Used:
Wacky 2
Celebrate 2

Sunday, April 20, 2014

Creating a Sunburst using Kiwi Lane Templates

First and foremost: Happy Easter blog friends!  Hope you are able to spend this day enjoying family!
This post went up on Friday over at Kiwi Lane but because of other blog commitments, you get it today!
I love playing with my Kiwi Lane Templates because you just never know what they are going to inspire!  Today's post uses some of the brand new "Wacky" templates which are definitely some of my new faves!


This layout is full of techniques but for today let's focus on two things: creating a sunburst and stitching.  First up I'll show you how I created the sunburst!


1. Choose your template and set it where you want it on your paper.  You will be using this paper as a template for the papers that you will actually cut up.  Outline your Kiwi Lane Template.
2. Use a ruler to draw lines from a point to the outer edge.
3. Label each section of the starburst with a letter so that you know how to put it back together.  Cut out each piece and use those pieces as your templates for cutting out your patterned paper.
4. Put the whole thing back together and glue it down.

Now that you have assembled the whole thing you might find you have some kinda rough edges between your bursts.  I like to use a zigzag machine stitch to connect the papers and hide and little flaws.


1. You are going to do a long zig zag stitch between each of the patterns - begin at the tips of the sun and work towards the outside of the paper.
2.  Once you have done all of them you will be left with a mess of strings all over the place. Simply trimming won't work because you run the risk of them slipping out. My favorite thing to do is go to the back side and pull the strings all through to the back.
3. It's a mess on the back but that's no big deal! Tape them down with some washi tape.
4. Now you have a nice clean front!

Supplies Used:
Patterned Paper: My Mind's Eye
Stickers: My Mind's Eye
Overlays: My Mind's Eye
Enamel dots: My Mind's Eye
Buttons: My Mind's Eye

Friday, April 11, 2014

Sketchy Saturday - Week 6 - GIVEAWAY!

If you are looking for the Samantha Walker blog hop you can find it right below this one!

It's hard to believe that I have already been at Sketchy Saturdays here for 6 weeks.  I so appreciate all of you that have been sharing your creations with me!  I would love to see even more of you share them with me!  My talented friend Cathy has played along with me every week and I have loved seeing each and every one of her creations!  So Cathy and I are going to be doing a couple of giveaways!

The first giveaway will be to someone who shares one of their sketch interpretations with me by May 15th.  You can complete any sketch you'd like and share it on my Scrapping with Christine Facebook Page. You can enter more than once!  The prize package is pictured below:


And the second prize will be for a follower (on either of our blogs - or both for two chances) who leaves a comment.  Just let us know which sketch has been your favorite (you can find them all here).

Now on to this week's sketch:


Each week I like my layout more than the last - loving this sketchy adventure so much!  For this layout I did my journaling about five things that Cooper does right now that I love.  Documenting some of those less easily remembered memories!

Supplies Used:
Patterned Paper: American Crafts & My Mind's Eye
Stickers: My Mind's Eye
Wood: Studio Calico
Twine: The Twinery

Tomorrow I will have a big, huge, ginormous giveaway that you will want to make sure to check out!  See you then!

Sunday, December 29, 2013

Playing with the My Mind's Eye Sketch


My Mind's Eye December Sketch - by Ronda Palazzari

As soon as I saw this month's sketch at My Mind's Eye, I knew I wanted to play along.  Lucy wanted me to take a picture of her with her new doll and make the picture right away, so this was the perfect excuse to do just that!  I had tons of pieces left from Cut & Paste and they were a good match for the outfits her and her doll were wearing! I absolutely love how beautifully My Mind's Eye coordinates their lines...they have become a new favorite of mine! Over the last six months I have had the opportunity to play with their lines on several occasions and now I can't get enough!


I'm not much of a sketch person.  I want to change that this year and so this was a good jumping off point.  I'm going to be honest with you...as I started I was hating the direction it was going.  But as I continued, I liked it more and more!  As you can clearly see I definitely started with the sketch but really carried it in my own direction from there.  The words "And So It Begins" were a perfect addition to the new world we've unleashed with an American Girl Doll in the house!  If you follow me on Pinterest you are going to see that I am definitely pinning more sketches....and going to be giving this element of the industry a real shot!

Supplies Used:
Patterned Paper: My Mind's Eye
Brads: My Mind's Eye
Stickers: My Mind's Eye
Wood: Studio Calico

Sunday, December 22, 2013

Washi Tape Christmas Card

I've been cranking out a few more Christmas cards and have those to share with you over the next few days!  First up is one where I played with washi tape and chevrons...totally inspired by this post on the My Mind's Eye blog.

I won't go into depth as to how I created it, because the link will tell you just that!  I will tell you it was fast and a fun experiment in figuring out patterns and colors to play with.  I knew I wanted a non-traditional color scheme!  Cards like this are perfect for that time when you need a few quiet moments to create (which in my case means breathe) but don't have tons of time!  

Supplies Used:
Washi Tape: My Mind's Eye & Queen & Co
Sticker: Jillibean Soup

Wednesday, December 18, 2013

Ideas for Creating a Pretty Gift Bag

If you aren't careful, wrapping a gift can cost a fortune.  I love to present things in a pretty manner and of course still want it to be frugal too!  I had several gift cards to wrap up this year and wanted to present them in a way other than inside of a card.  Enter my new favorite thing to decorate....a brown paper bag.  I'm telling you what, you can make a brown bag look gorgeous simply by adding a some white doilies and stickers to it.  For today's edition I used primarily SRM Christmas Stickers.  SRM Stickers are a go to in my stash because they are see through, which makes them work with just about everything!
 For all three bags I used a doily (or two), a twine bow, a Christmas tree sticker (SRM Stickers by the Dozen), and a washi tape covered clothespin.  Other than that they each took on a life of their own!

For this one I used a big "Merry Christmas" title that I cut in half and then placed it.  

On this one I used several of the borders from SRM Stickers...actually everything but the Christmas trees are borders (just trimmed down)

I think this one actually ended up being my favorite!  I like the pop of yellow and got to play with my new star punch on it!

So the next time you are stuck for gift wrap, look around your craft area and see what you can come up with to make a one of a kind presentation!

Supplies Used:
Stickers: SRM Stickers, Teresa Collins
Star punch: Fiskars
Sequins: Teresa Collins
Doily: Wilton
Washi Tape: My Minds Eye & Doodlebug Design


Friday, November 15, 2013

Kachow

My middle son is the hilarious.  He makes us laugh constantly with the funny things he says and does and you can tell that oftentimes he is looking for a laugh.  I try to document as many of those funny stories  as I can and this layout is exactly that.
I used some patterned paper and die cuts from Elle's Studio.  I haven't ever used anything from them before - but really enjoyed this "Cameron" line.  The pictures are jsut various cute pictures of Cooper around the time that he did this funny thing.  I also added some Studio Calico Wood Veneer pieces and some enamel dots throughout.  This was a quick and simple one but does the important job of saving a memory for me!

Supplies Used:
Patterned Paper: Elle's Studio, Pebbles
Die Cuts: Elle's Studio
Letter Stickers: Jillibean Soup, American Crafts
Washi Tape: My Mind's Eye
Enamel Dots: My Minds Eye, Queen & Co.

Friday, November 1, 2013

Kiwi Lane Designs Blog Hop


Welcome to the November Kiwi Lane Designs Blog Hop! If' this is your first stop, you should head back to the Kiwi Lane Blog so you can make your way thru the whole hop! I am thrilled to be participating this month with some of my fellow Kiwi Lane fans to share scrapbooking inspiration using their fabulous designer templates!  I've got giveaways to share...but first let's get down to why you're here...to check out a fun Kiwi Lane project!

When I saw the new "Cut & Paste" line from My Minds Eye, I knew I had to have this portion of it.  the color combination is stunning and it works perfectly for boy themed pages but also has some feminine pieces to it also.  Paired with Kiwi Lane it made for such a fun layout!  I used the Abbie Road border set to create my blue border.  After cutting it out, I cut it down into 1/2" stripcs until I got close to the top.  I then laid those out at the bottom and slid my pictures into it.  I also added some circles I cut from the Tiny Shapes Accessory Set.  I also added an arrow from the Nature Accessory Set as an accent in my title.    

Do you love giveaways?  Here's your chance at two different ones:
Kiwi Lane is going to pick a fan from ONE of the participating blogs (including the Kiwi Lane blog), to receive a $25 gift certificate to the Kiwi Lane Shop.  Just make sure to leave a comment at each blog along the way!  The winner will be announced on the Kiwi Lane blog on Thursday, November 7th. 

Secondly as a thank you for visiting my blog today I have a roll of Doodlebug Designs Washi Tape and a Kiwi Lane Designs Sweetheart set for one of my readers.
sweetheart
You can enter by doing any or all of the following: become a follower here, become a fan on my facebook page, or become an email subscriber to this blog.  Leave me a comment telling me which you did and I will announce a winner on Thursday, November 7th!

In Case you Get Lost, Here's the Lineup for the Hop today:
Kiwi Lane http://kiwilane.com/here/blog/
Cristine Redmond http://onescrappynovice.blogspot.com
Joy Nielsen www.threadsnscraps.com
Van Nguyen http://likethecar.blogspot.com
Minousha Bari  http://preservedscraps.blogspot.com
Lissa Mitchell http://mightycrafty.blogspot.com
Arin Flynn http://apieceoflifespie.com
Kerri Smith http://www.crafttimeandcupcakes.com/ 
Christine Meyer http://scrappingwithchristine.blogspot.com *******You Are Here*******
Christina Steel www.tinasscrapcrap.blogspot.com ****Go Here Next******

Thanks so much for stopping in today - head on over to see Christina Steel next!

Wednesday, October 30, 2013

Halloween Brown Bag

I have been enjoying all the little gift bag inspiration that I have been seeing on Pinterest lately!  From burlap to canvas to brown bags.  I thought I'd try my hand at creating a brown bag that was Halloween themed!

I used some Halloween stamps from Momenta to create this.  The spider border is created by stamping one after another.  I then also stamped the sentiment and then folded it, along with an orange banner, over the top of the bag and then secured it with a black wood clothespin.  Finished the whole thing off with some great washi tape.  I'm excited to try some more of these in other themes....love how quickly you can jazz up a simple brown bag!

Supplies Used:
Stamps: Momenta
Patterned Paper: Momenta
Cardstock: American Crafts
Washi Tape: My Minds Eye
Color Mist: Heidi Swapp

Saturday, October 26, 2013

Happy Haunting Halloween Lantern

Popping in to share my last creation with "Happy Haunting" by My Mind's Eye!  Thanks to some help from my Silhouette Cameo, I created a little Halloween lantern!  They had several choices available and I opted for the spider web one.  Not to creepy and not too cute, just right :)

I added some glittery paper behind the webs on the lower parts but not the top part so that if I want to actually use a candle (seems like a battery powered tea light would be the smart option here) I can still have it shine thru!

Chipboard sentiment and shapes were perfect to decorate each side.  I also added some fun brads to the top creases - that bat shape and brad just had to be used!  I also used some black pom pom trim that I have been hoarding for awhile now.  My ribbon and trim piles are getting a little insane....need to start purging those and getting them organized.

Hope you have enjoyed all the fun projects with this line.  It is available at The Scrapbooking Studio!

Supplies Used:
Cardstock: American Crafts
Patterned Paper: My Minds Eye
Chipboard: My Minds Eye
Brads: My Minds Eye
Twine: The Twinery


Friday, October 18, 2013

Eat Drink & Be Scray: My Minds Eye "Happy Hauntings" Layout

I've decided that handsdown Halloween is my favorite day to paper craft.  I am always happy with what I come up with for Halloween!  Here's another layout I created for The Scrapbooking Studio.  I'm pretty sure it weighs a couple pounds because it is layer upon layer upon layer :)
Tips: See those scallops with the spiderwebs up top?  Those are actually plain old fussy cut circles - I stamped the spider web in them and then cut them in half.  I also wanted some additional texture underneath my skeleton - so I used my fringe scissors and cut up thesolid cardstock that way!

Supplies Used:
Fringe Scissors: Martha Stewart
Stickers, Paper, Stamps: My Minds Eye

Tuesday, October 15, 2013

My Minds Eye "Happy Haunting Card"

Fussy cutting was the name of the game for my projects for The Scrapbooking Studio this month. And this card was no exception!  
My Minds Eye "Happy Haunting Card" by Christine Meyer for The Scrapbooking Studio
I cut out the glitter border and the 31 from patterned paper.  I also cut the striped border from some patterned paper.  Probably my favorite thing about this card is the stamping I did! I haven't done a lot of stamping in recent days...so it was nice to exercise that part of my brain again :)

Tips:  Clear stamps are perfect for curving and making them work with your design as I did with my words curving along with my 3 and 1.  

Supplies Used:
All Supplies are My Minds Eye "Happy Haunting"


Tuesday, August 27, 2013

Clean & Simple Boy Cards

I have three sons.  Words I never thought I'd say.  As much as I enjoy scrapping girl stuff, I am constantly playing around with boy stuff to see how I incorporate fun techniques and such.  Today I have a couple of clean and simple cards to share with you that I created for boys. Both of these cards only took about 20 minutes to create - very simple and a quick way to use up some extra supplies that I knew I wouldn't use on a layout! 

 For this card I used a patterned paper base.  I added white cardstock and dropped mist splatters onto the top. I then added a couple stickers and done!  

Supplies Used:
Stickers: American Crafts, Heidi Swapp, Echo Park
Patterned Paper: Websters Pages

On this card I decided to offset things.  I added patterned paper to my base to create my background.  I then used white cardstock and coordinated my stickers with a washi tape background.  I used a black marker to highlight the S O N letters.  I also used my black marker to outline various parts of the card to give everything a little more definition. 

Supplies Used:
Patterned Paper: Echo Park
Washi Tape: Bella Blvd, My Minds Eye,
Stickers: Echo Park
Wood: Studio Calico

Wednesday, August 7, 2013

Rolled Paper layouts with My Minds Eye

I love patterned paper and I am so glad to see so many companies offering the 6 X 6 paper pads.  It's such a great way to get all the sheets from a collection without breaking the bank.  I had fun playing with a variety of papers from the Kate & Co line from My Minds Eye to create this layout.  the double sided papers in the pad were perfect for trying out a rolling technique.
 I'm a sucker for any patterned paper that includes navy blue.  I'm not sure why but that is definitely my go to color!  To create my rolled paper background I cut 2 X 6 inch strips of paper.  I then did my bottom row, lining it up with the bottom of my white cardstock base but only putting adhesive about 3 inches up.  I rolled over the tops making sure that they were different heights.  I then slid my second row underneath those and did the same.  I knew I wanted to leave the top plain white giving the eyes someplace to rest amongst all the patterns :).I added my pictures with simple clusters of embellishments, letters, and words.  Kind of a fun technique to try!

Supplies Used:
Patterned Paper: My Minds Eye
Arrows: Jillibean Soup
Borders: GCD Studios
Letter Stickers: American Crafts & Jillibean soup
Die Cut: american Crafts

LinkWithin

Related Posts Plugin for WordPress, Blogger...