Tuesday, September 30, 2014

Converting Raw Chipboard to fabulous Gold!

  As a clean and simple style artist, I often struggle with what to do with raw chipboard.  A lot of times I leave it alone or just paint it white.  But today I stepped out of my comfort zone a little bit while still staying true to my style.  For today's layout I covered my raw chipboard using Ranger Perfect Pearls.

This layout needed a perfect gold accent and the Fern Flourish was just what I was looking for!  I needed something with some curves and flow to it to break up all the straight lines.  

To cover it with Perfect Pearls, I simply worked slowly straight from the bottle.  Slowly letting liquid out and fill it in more as needed.  It dried beautifully and I love the shimmer it adds without being to feminine.

Supplies Used:
Patterned Paper: My Mind's Eye
Stickers: My Mind's Eye & Heidi Swapp
Chipboard: Leaky Shed Studio
Mist: Heidi Swapp

Sunday, September 28, 2014

A Tour of my Scrapbooking Room

I recently got to redo my scrapbooking room because my old one had some flooding issues.  So when my friend, Kelly, asked if she could tag me to show my room I thought it was the perfect chance to finally share these pictures with you!

I live in a parsonage - which means I live in a house that is owned by the church where my husband is Pastor.  Our house has ample room for all of us and rooms in the basement which allows me to have my own scrapbooking room.  I know that is a luxury and am very thankful for that!  My room is very functional for me - all my design team products have specific homes as do products from my favorite companies.  I am a big time purger - so if it isn't being used I get rid of it. I try very hard to keep things organized because I think it makes me much more efficient and creative!   It's not fancy and is almost entirely made up of pieces from yard sales - but here it is - my scrapbooking studio :)

Throughout the room I have different altered pieces that I have made - ones that haven't found a home elsewhere yet and help to make the room my own.  This first shelf holds my Thickers container up top and next to it is a crate where I store 12 X 12 sticker sheets and papers from miscellaneous companies.  The second shelf is all my punches.  I don't have a lot, I only keep what I use regularly.  The next shelf is my design team box for Samantha Walker and small paper pads for Paper House.
The bottom shelf is class supplies and cards that I have made.

This shelf just got reorganized!  Up top I have all my 12 X 12 paper pads and smaller paper pads.  The two shelves with bins are now filled up with different supplies from Core'dinations.  The bottom is mostly containers of ribbon - that is an area that I need to do some more purging!  

This little dresser holds design team goodies - one drawer is all Leaky Shed, one drawer is my Imaginisce tools, and the other two a mishmash of other design team things that I couldn't find a good home for!

I've always wanted a display wall and this time I made one.  The lower level is made up of my favorite cards and some published cards.

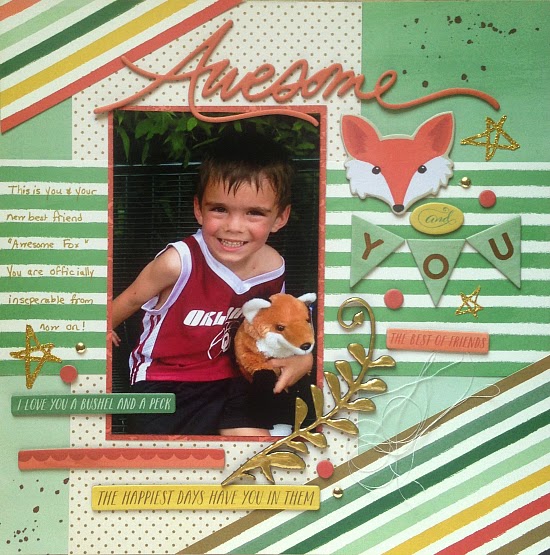
The top level is some of my favorite layouts.

I no longer had a use for a changing table for my kids so I moved it into my room!  The top is used for my Cinch machine and my Cuttlebug.  The bottom is just general storage.

I really needed a good way to store my Paper House Stickers so I knew what I had to work with - I used this beat up old peg board for that.  I love the color and happiness I see when I look at that corner :)

This storage rack is the best thing I have ever found at a yard sale - I got it for $10!!!  I use it for drawers for some of my favorite companies products - each one gets a drawer so I can keep them all together.  The bottom and biggest drawer is just scraps.  Above it I have two racks - one is full of cups with miscellaneous storage (dies, punches, etc) and the second is all my Kiwi Lane Templates.

I also store my washi tape up there on what was intended to be a dish drying rack.
  
This is my desk - more cups on racks full of miscellaneous embellishments and tools are hung above it.  I have a lazy susan where I keep my most used adhesives and tools.  I also have a tray with 8 1/2 X 11 papers and a another shelf for pictures.  The drawers on my desk are reserved for design team product - I have one for SRM Stickers, Imaginisce, Paper House Productions, and The Twinery. As my teams change so do the drawers.

I haven't found a better solution for my wood veneer pieces so I keep them here in an old tupperware container.

On top of this dresser I keep all my mists and drawers with little embellishments. 

The biggest change that came with this room was adding in an extra table.  This has been great because it gives me multiple areas to work and I can bounce between projects.  It also makes it so there is plenty of room for someone else to join me!

Underneath the table I keep my cardstock, another scrap basket, and a rolling cart that has stuff my daughter is allowed to use in it.

Lastly I'll show my Raskog which my hubby got me for my birthday last year.  I love this thing!  It looks like a mess but each little compartment is home to little things that I needed to organize - from chipboard pieces, to silhouette cuts, to rub-ons.  It has made me use all those little details way more!

Now on to a few questions about me:
1. What am I working on right now?
I have a huge list of design team work for the week but am most excited about something I am doing with a new product from SRM Stickers!

2. How long does it take me to create a project?
An hour give or take - unless it's something big.  If my kids are helping, who knows :)

3. What are my favorite things to create with at the moment?
Bright and colorful patterned papers, anything gold, and fun lettering

4. How does my creating process work?
I usually start with the product or photo I want to use and then work from there. I don't usually have  a plan laid out I just let my brain and creativity go where it goes. 

5. How do I become inspired and stay inspired?
Looking at blogs, facebook, and pinterest.  I am very visual so studying patterns and designs for fresh ideas. Having fresh product on hand also really helps!

6. What is my signature style?
This has always been a tough question for me! I have a clean and whimsical style that incorporates bold color choices and dabbles in product and design trends. Here's a few projects that I think show off my style well:


Today I am tagging my two friends Erin & Lyne to share their Scrapbooking Rooms and a little about themselves!  You should definitely head back over and check out Kelly's room too!


Friday, September 26, 2014

Scrapping Our Stash Blog Hop - September

If you are looking for the October Blog Hop - Click Here!

Welcome to the Practical Scrappers Blog Hop 
where we are Scrapping our Stash.  

You should have arrived from the Cathy's Blog - if you didn't you may want to go back and check out everyone's blogs for lots of inspirations and giveaways!  I know you'll enjoy the inspiration that they are providing!

This month (and from here on out) we are inviting anyone who's interested in joining the stash busting hop to join us.  If you want to join us next month email me at practicalscrappers@gmail.com.

Here's the entire Hop List in case you get lost along the way:
Suzanna  http://lifestrivialities.typepad.com/ *Head here next*

For my project this month I got out some Doodlebug Hip, Hip, Hooray and worked with a picture from my youngest son's birthday last week! Cathy (where you came from) created using this same line - how fun to see it used in two different ways!
I love the way Doodlebug's lines are coordinated and come together quickly and easily.  It leaves lots of time for my favorite part - the embellishing!  One of my favorite things to do with paper crafts is to look at paper and stickers and try to find a clever twist on their use.  I did a couple things today that were out of the box.  

First off I cut out the "Happy" word out of grid paper.
Makes for a one of a kind title doesn't it!?!

I also added the letters to spell out Dude on the little monsters at the bottom
Little details like this help to make the layout my own and full of surprise! 


As a Thank You for stopping by today I am going to do a Stash Busting Giveaway!  The winner will get one yard of each of the bakers twine rolls pictured below!  How fun will that be to receive!?!
You can do any or all of the following to enter:
1) Become a follower here
2) Like my Scrapping with Christine facebook page
3) Pin the layout picture onto Pinterest
And lastly leave me a comment to let me know which you have done!

This giveaway will remain open until 11:59 pm on October 3rd!  I will announce a winner within a couple days!  

If you are interested - I also have a giveaway on the post located here that is open until the 1st!


Now Hop on Over to the talented Suzanna's Blog!


Tuesday, September 23, 2014

Adornit Guest Designer Days 1-5 and a Giveaway!

This week I am the featured guest designer at Adornit!
Each day I will be adding a new project to this post so be sure to check back!
I will be sharing projects all week both here and on their blog! I love their paper crafting collections and am thrilled to be sharing what I created!  They supplied me with two new collections: Rhapsody Bop and You & Me.

Day One:
Today I have a layout using Rhapsody Bop:
The colors of Rhapsody Bop are a beautiful mix of vibrant and soft - a combination that comes together perfectly for little girl layouts!  I absolutely loved this floral patterned paper and knew I wanted to use it in a big way so I made it the base of my layout.  Because of the brightness of that paper I went much more subtle for the center using a light polka dot pattern to anchor my black and white pictures.  I cut out and stitched on a large white heart to surround the pictures.  Embellishing was made easy by using coordinating die cuts and clear stickers

Day Two:
Since I did one vibrant project already with Rhapsody Bop I thought it would be nice to do one with the softer colors. 
 The border printed on this patterned paper is beautiful and makes for an easy start to the layout.  I added a border sticker above it and then built the heart of my layout above it.  I opted for just one picture because I had already used up so much space. I built clusters of embellishments around the picture as well as adding an area for journaling.

Day Three:
This card just kind of fell into my lap as I was playing with the scraps of You & Me!  You & Me is another new collection from Adornit.  I laid the marquee die cut on top of one of the pocket page elements that I had cut out and it fit on there so perfectly, I knew i had to use it!  Adding it to a base and embellishing with fussy cut flowers made for a quick but striking card.

As I mentioned with my layout, I really loved that floral patterned paper from Rhapsody Bop so I wanted to use it again on a card.  As I was contemplating what I wanted to do I noticed that one of the clear stickers looked like it would fit on a wood piece.  As you can see it wasn't 100% exact but close enough that it adds some thing unique to the wood and makes a great focal point on the card.


Day Four:
I love to make Altered Embroidery Hoops and hang them around the house.  Mine always include pictures and this was no different.  I haven't made one yet of my hubby and I so I made use of "You & Me" to create one!  I love the look of the clear stickers layered onto the print background so you can see both elements.  I made use of stickers, die cuts, and wood also on this!

Day FIVE:
Today is my last day guest designing at Adornit and I have one last layout to share that uses the You & Me collection.
I didn't have very many pictures of me and my hubby from recent days so this was a perfect opportunity to do a quick little photo shoot so I could create a pretty layout about our 14th year of marriage. For this layout I really focused my embellishing on the wood pieces.  For the title pieces, I painted them half black and left them half natural.  I had recently seen Stephanie Buice  do something similar on chipboard and thought it would work neat on wood too!  For the rest of my wood I colored the pieces and then decorated them with a fine tip black marker. I love how wood gives you some freedom to play with a variety of mediums to decorate!  The clear stickers on this patterned paper really pop too!

Adornit has been generous enough to let me host a giveaway of the Rhapsody Bop collection to one of my readers!  Here's how you can enter:

You can do either or both of the following to enter:
1) Become a follower here
2) Like my Scrapping with Christine facebook page
And lastly leave me a comment to let me know which you have done! As I am adding to this post each day of the guest designing gig - you are welcome to comment each day!

This giveaway will be open on all my guest designer posts with them this week so make sure to check back!

This giveaway will remain open until 11:59 pm on October 1st!  I will announce a winner within a couple days!  And if you are interested in checking out one more blog hop I am in that also has a giveaway, click here!

Monday, September 22, 2014

Altered Clothes Pins + Fun Pictures = Great Banner

I recently had to move my scrapbooking studio to a different location in our house.  With that comes some fun new decorating!  Today I have a simple project that makes use of Paper House Productions Canvas stickers and some clothespins
To start with I altered the clothespins by adding colorful patterned paper that coordinated with the canvas stickers.  The canvas is the perfect cushion for opening and closing the clothes pins!
 
I used my Silhouette to cut out some letters in white and patterned papers - using half of the patterned cut on the bottom half of the letters and heart. I cut out some pictures and matted them.  I then hung up a simple white rope and hung each piece to the banner.  Super simple and easy to change out the pictures or even change out the letters to say something else.  

Saturday, September 20, 2014

Making a Halloween Treat Container

I am up on the SRM Stickers blog with these fun little Halloween Treats!  Come on by and check out all the details!

Friday, September 19, 2014

The Twinery & Ruby Rock-It Blog Hop

TwineryBlogHopBadgeRUBYROCKITSeptember

Welcome to Day 2 of The Twinery and Ruby Rock-It Blog Hop!
You should have arrived here from Candice Elliot's Blog.  
If you just happened upon things here today make sure to head back to The Twinery blog  to get in on the whole hop!  Make sure to leave comments along the way to get in on prizes!

I worked with the Heritage Collection  from Ruby Rock-It and decided to focus on the cream, brown, and turquoise colors.  There are so many beautiful colors in this line!

I stained the wood pieces to be a darker brown that matched the other elements.  I then backed the oval shape with Natural Solid Bakers Twine to create a unique background for the silhouette.  The whole card is accented by a pretty bow using the Ocean Stripe Bakers Twine.

Check out these prizes that are up for grabs!
TTPrizeTHREESpoolsWinnersChoice

RubyRockItEssenceEmpireBebecollection+-+ALBUM+NOT+INCLUDED
 One lucky winner can win three spools of Twinery twine of the winner's choice ($45 retail value). Another lucky winner can win the Ruby Rock-It Essence Empire Bebe Collection, with the exception of the album.The rules are available on each manufacturer's blog!

Here's the whole hop list for today:

Up next on the hop is Kaka - check out her amazing work!


Thursday, September 18, 2014

Getting a jump start on Halloween cards

I'm hosting the blog today at Leaky Shed Studio with a fun little Halloween Card!
Did you know Leaky Shed has some items in cardstock too?  This is one of those items - this black tree set comes with two sizes and is black which makes it perfect for those Halloween projects!

By simply adding some gemstones to it and some Halloween characters throughout it makes for an eye catching card that will be fun for all the little spooks in your life!

Supplies Used:
Patterned Paper: Doodlebug 
Stickers: Doodlebug
Twine: The Twinery
Tree: Leaky Shed Studio

Monday, September 15, 2014

Inspiration Elevator - Using a BIG photo on a layout

Several of my friends from Practical Scrappers participate in a monthly inspiration challenge called Inspiration Elevator.  They asked me to play along this month as a guest designer!

A little about Inspiration Elevator:
Our main purpose here at IE is to challenge ourselves, each other and 
YOU to take the creative process to the next level;  to inspire growth 
and change in our scrapbooking beyond the mundane.

You can see all of Inspiration Elevator's previous challenges at our blog and catch us on Facebook .

This month's challenge is issued by the creative Christa Uttley. Here is her challenge for us, in her own words:

 GO BIG OR GO HOME: Scrapbookers as a rule use what photos they have on 
hand or if you are designing, whatever pictures allow you to best 
showcase your lines or express your paper lines. This month's challenge 
is to be very deliberate about your photo choice because we are going 
BIG! Bigger than 8x10 if you can do it. Recently, I saw a friend using a 
12x12 she had printed at the local 
Costco and was stunned at the power this GIANT image had on her story 
telling. (If you'd rather not spend any extra on your photo then scrap 
those large baby pictures or a wedding shot you have lying around.)  
Think scenic vistas or think about all the details that go missing in 
your world and blow them up. Be brave!


 Here are the MUST DO's: Must be at least 8x10 in size. We want this 
GIANT photo to take centre stage and tell the story in a big way.

Here's the lineup for today's inspiration:

And without further adieu here is my interpretation!
One thing I almost always do when using a big picture is find a way to incorporate the title into it - I love the look of a title on a picture.  My family is big - 6 of us - so we by default require a larger than average picture if we're all squeezing in!  This one from our summer vacation was perfect to fit the challenge!  Using a big photograph requires even more creative placement of embellishments and such.  I just used border strips (which are looking a little wonky because my layout kept bowing because of the borders) and a few embellishment clusters.  Thanks to the ladies for letting me play along this month!

Supplies Used:
Patterned Paper: Bella Blvd
Stickers: Bella Blvd


Saturday, September 13, 2014

Sketchy Saturday Week 20 - Using Pocket Page elements on a Sketch

It's been awhile since I have had the chance to share a sketch!  I have actually had this one prepared for a bit but have been busy soaking up Saturdays with my family.  Today's sketch is a little different because it makes use of pocket page pieces.  Mine come from Simple Stories and I built a grid of 2 rows of 3.  They are uneven rows but come together to tell one story.


I embellished things far beyond what the sketch has - but that is the fun of a sketch - having a jumping off point and running with it!  If you do anything with this sketch, I would love to see what you create!  Please share a link with me here or on my facebook page.

Supplies Used:
Patterned Paper: Simple Stories
Stickers: Simple Stories & Bella Blvd
Wood: Chic Tags


Thursday, September 11, 2014

Using Kiwi Lane Templates on 3 different types of Projects: Guest Design Spot

I am so excited to be guest designing on the Kiwi Lane Designs Blog this week sharing some of my new projects with you!  I have been a long time fan of Bella Blvd products and they are one of my favorites for two page layouts!  My last post as a design team member at Kiwi Lane was actually a  two page layout using Bella Blvd (you can check it out here)!  First up is a two page layout using the Molly line.Lovely Lucy Bella BLVD 2-page layout
The pink patterned paper with the words on it jumped out at me because of all it’s curves and swirls.  I knew it would be perfect to combine with Kiwi Templates.  I went with the Chestnut Drive Border Set because the curves pretty much fit around the word “Beautiful” perfectly.  After cutting that out for both sides, I added my pictures so that they would be enhanced by the curves.  The Chevron Border Templates are pretty much my favorite – so I used those also to create borders along the bottom.  Bella Blvd makes lots of great border stickers as well as a patterned paper sheet of borders – these complement the Kiwi Lane Border system so well!  To embellish the page I used the Rings Set (to create my sunshine) and the Tags Set for my journalling spot.

Pocket Page

We love our two pagers here at Kiwi Lane but we also know that the templates are great for other things too!  Next up I have a pocket page layout that makes use of them.Project Life Bella BLVD Layout
This pocket page has a really neat narrow side border which was screaming “Kiwi Lane, Kiwi Lane, Kiwi Lane” at me.  So I obliged ;).  I used one of the Large Brackets to create a layered border there.  I then filled each of the other pockets with layers of paper and pictures.  The Shapes set was especially useful for creating just basic shapes to highlight the photos. The Tags set was also useful for creating my “title” pocket with it’s perfect banner shape.

Paper Piecing

Lastly I have one of my favorite techniques using Kiwi Lane to share: paper piecing with the Chevron Border Set.The Joys of Boys Bella BLVD
I have done this technique a couple of other times!  Once for a Kiwi Lane Hop that you can find here and once for a Stash Busting Hop that you can find here.  Every time I need to combine vibrant papers with Kiwi Lane supplies I want to do this.  The Max line from Bella Blvd was perfect!  To do it I create five Chevron borders in five coordinating papers.  I then cut the chevrons apart and piece them back together.  There is something so satisfying about taking beautiful papers and putting them together in a different way to make them your own!  One thing I would recommend when trying this technique is having a good black pen to outline your shapes with.  I think they get a little lost otherwise and the black just makes them pop!

Wednesday, September 10, 2014

Samantha Walker Creative Team Blog Hop: Fall

Welcome to the 
Samantha Walker Creative Crafters Team Blog Hop!
You should have arrived here from Nicole Stark's Blog!

We have a fabulous giveaway this month of a Spellbinder's Fall Splendor Grand Impressabilities

All you need to do is enter below. You can earn multiple entries by following us on Facebook, commenting below, tweeting about the giveaway, and signing up for the email updates. This giveaway is open to US customers only and closes on this Sunday at 11:59 PM MDT.
a Rafflecopter giveaway

For my project this month I combined a couple things that I love - metallics, sequins, and leaves!  I have a shaker card that I made using the 3 leaves card (51469)
I always save good wrappers from sticker sets and other embellishment sets because they make great containers for making shaker cards.  For this one I used an old wrapper and filled it with gold, white, and silver sequins.  I then sealed off the top and attached it to the backside of my base.  I layered the base onto an additional white cardstock base to add some dimension.  I then added the whole thing to a metallic gold card.  Because the shaker part in itself is busy I went very simple beyond that - adding just a chipboard sentiment and some additional metallic dots.  

When you move it around the sequins bounce all over and provide a different look at each glance!  Super fun and not too difficult to make (the hardest part was sorting thru my sequins :))

Don't forget to sign up for Samantha's Newsletter 
through the Rafflecopter widget to receive your
FREE SVG and Silhouette Studio file! 

Thanks so much for stopping in today! Next up is Jamie!  You can get to her blog by clicking on the picture below!

LinkWithin

Related Posts Plugin for WordPress, Blogger...