Showing posts with label Ribbons Unlimited. Show all posts

Monday, January 13, 2014

Happy Birthday Card

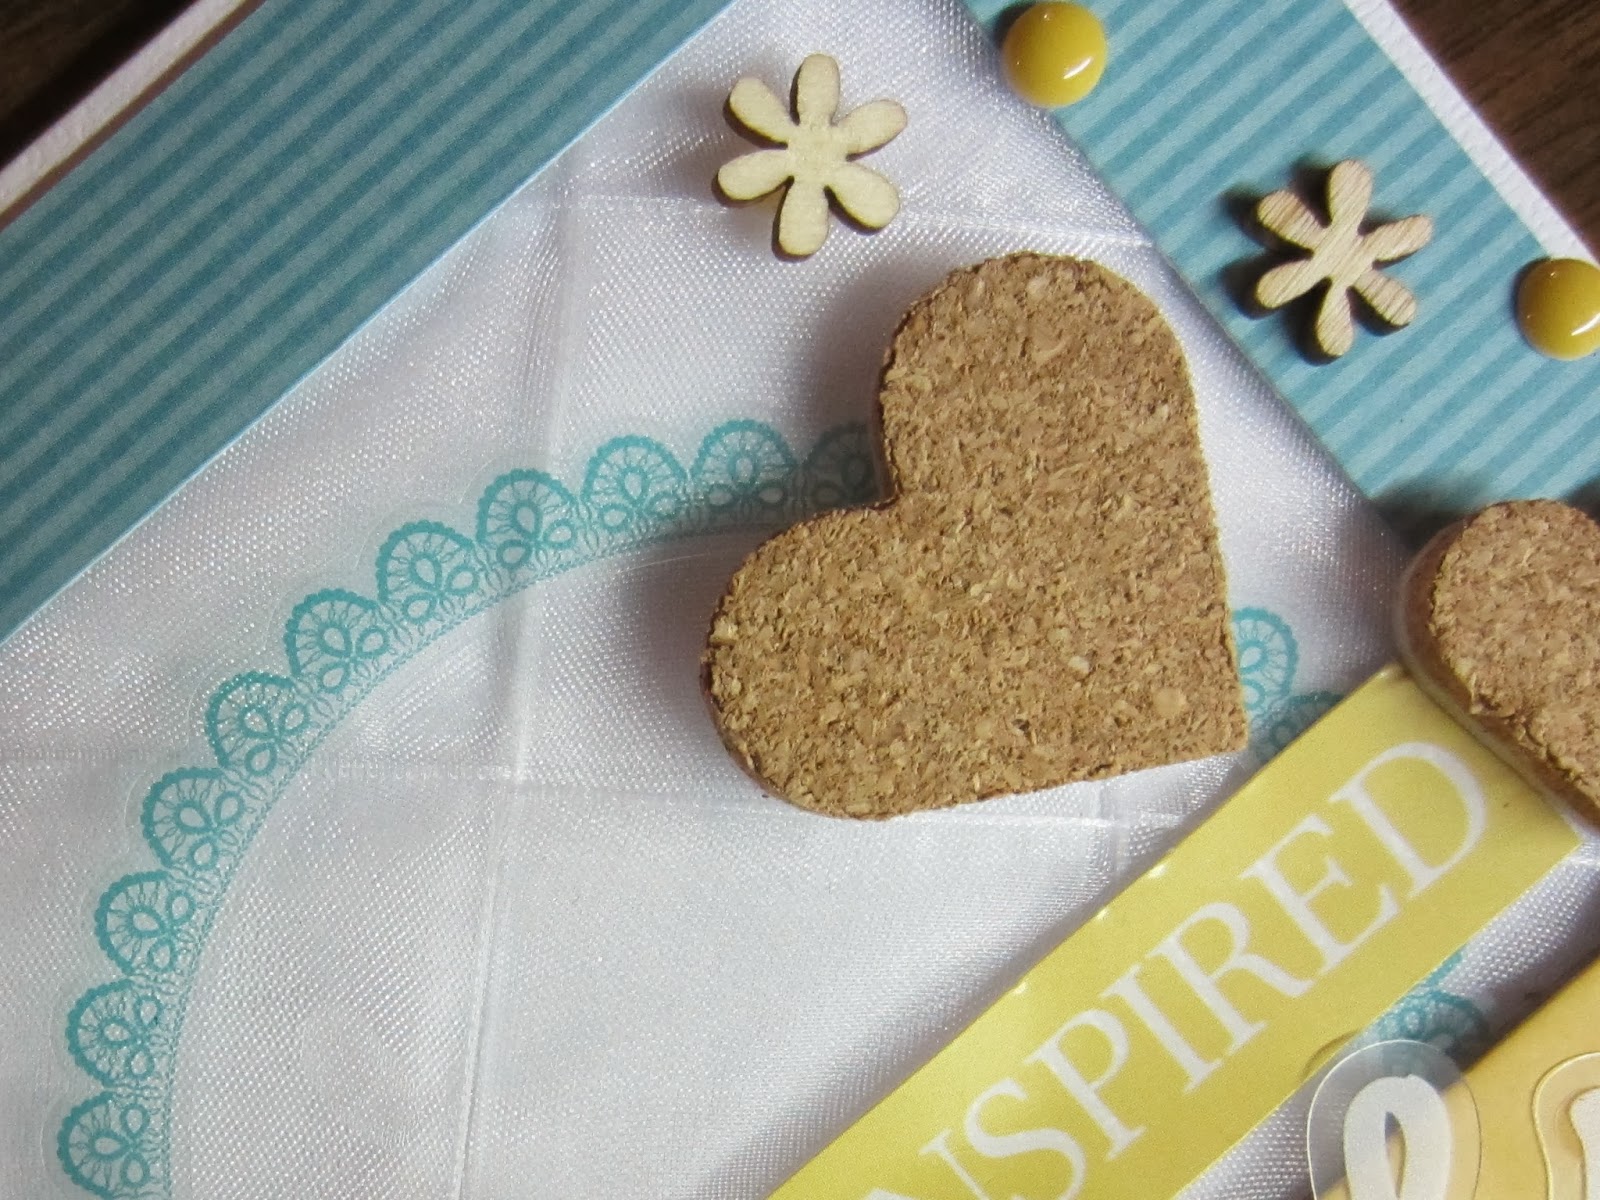
Last week was heavy on layouts and this week is going to be heavy on cards!  Today I have a birthday card  idea to share with you!

I created the background by weaving black ribbon.  Do not attempt this when you are tired or crabby.  It requires patience - but the finished product is definitely worth it!  I punched a variety of pretty patterned papers and added those.  Then came the dimension!  Cork, enamel dots, and pins all add some extra umph to it!  I opted for the cork to calm down all the bright colors a bit (yes sometimes I opt to calm things down :))) 

Supplies Used: 
Ribbon: Ribbons Unlimited
Patterned Paper: Paper House Productions
Enamel Dots: My Mind's Eye
Stickers: Pebbles & SRM Stickers
Pins: My Mind's Eye

Friday, January 3, 2014

Doll Hair Bows

Christmas is over and the recovery is on!  I have a little set of bows to share with you today that I created for my little girl as part of her Christmas present.  Her big dream for this request was an American Girl Doll.  It was a first for her!  She loves to do hair, so I wanted to make her some little bows to use in her new doll's hair that were just the right size!  
Make Doll Hairbows at Ribbons Unlimited with Christine Meyer http://ribbonsunlimited.blogspot.com
This lucky little doll has her own, one of a kind bows!  Today I am going to share with you how I created these bows.  And don't worry, they are quick and easy...especially with the right tools in hand!

Make Doll Hairbows at Ribbons Unlimited with Christine Meyer http://ribbonsunlimited.blogspot.com
I created several different little bows.  The key to making this work easily is to use ribbon that is less than 1/2" wide.  

I purchased some smaller clips that are about 1 1/2 inches long.  Perfect for a very little girl or a doll!  --To start you will want to cut a 4 inch strip of ribbon.

-Cover the top of the clip with fabric glue or hot glue (something that dries fast).  
-Then begin at one end and tack it down and create a loop until you get to the other side.  
-Add glue to the center and smash down the middle with your finger.

-Cut down the excess and use that to create the middle of your bow
-Add a dab of glue tot he center and wrap the piece around the center, securing it with glue to the bottom of the clip.
-Trim off excess.

-After allowing it to dry overnight, it should be ready for doll hair!

Make Doll Hairbows at Ribbons Unlimited with Christine Meyer http://ribbonsunlimited.blogspot.com
Now what colors should I make next?

Ribbon Supplies Used:

Wednesday, November 6, 2013

Frayed Knot on a Layout

 I am up over at the Ribbons Unlimited Blog today.  I don't think I have ever shared a layout there...it's always cards and other projects...so I decided this month it needed to be a layout!  I used one of our beautiful Lyon French Wired Ribbons that is the perfect addition to fall projects.
I really love this ribbon (Sandstone) because of the golden hues that come out in it, making it a perfect match for some fall projects.  First, I used the ribbon as a border strip underneath my photos and then I tied a knot and topped one end of the border with it.  Then to bring out those golden hues, I frayed the ends of my knot.   It's a simple, quick, but striking way to add some different texture to your layout! 

Check out that hilarious picture of my two youngest boys...oy!  Crazy is the perfect way to describe things :)

Ribbons Unlimited Supplies Used:
Other supplies Used:
Patterned Paper: Echo Park
Stickers: Echo Park & Bella Blvd
Cork: Fancy Pants

Wednesday, October 30, 2013

Embellishing a Paper Clip with Ribbon

I am up on the Ribbons Unlimited blog today!  I am always on the lookout for ways to use ribbon in new ways on my cards.  I was recently playing around with paper clips and came up with a simple and different way to incorporate ribbon!

Paperclips are trendy and easy to find...so why not find a way to incorporate them on a card!  I simply tied a knot at the top of mine and slid it over a ribbon strip on my card.  Think of the possibilities on this - you could do anything from cute to elegant depending on your ribbon choice and make use of it on layouts, tags, cards and more.  

Ribbons Unlimited Supplies Used:

Other Supplies Used:
Patterned Paper: American Crafts, Momenta
Enamel Dots: My Minds eye
Stickers: American Crafts, Jillibean Soup

Wednesday, October 2, 2013

Weaving together a beautiful card

I am up today at Ribbons Unlimited sharing another weaving card!  
How to incorporate weaving on a card by Christine Meyer for Ribbons Unlimited
Last week I used the a wide white organdy but this week I used a Delight Satin Edge Ribbon in black that is just 5/8" wide.  It is a little more challenging to weave and keep things straight...but in the end it worked!
If you look closely you can see that I used it in my circle.  

Tips: To create this look, I traced almost a whole circle on the edge of my card and cut that out.  I weaved my ribbon onto a rectangle piece of black cardstock that would fit behind the circle.  Once done, I attached it with strong wet adhesive and set in under a book to flatten it out.

This technique is fairly new to me, especially with ribbon, but is one that I plan to use again to add texture and sophistication to my projects!  

Supplies Used:
Patterned Paper: Teresa Collins
Stickers: SRM Stickers (Sentiment), Paper House Productions (rose)
Metal Embellishment: Momenta

Thursday, September 26, 2013

Weaving Ribbon to create a card background

I have one of those weeks where I am up on several blogs on the same day.  This card actually went up yesterday at Ribbons Unlimited, but because of my We R Memory Keepers post, I saved it for today!
Weaving Ribbon to create a card background by Christine Meyer for Ribbons Unlimited http://scrappingwithchristine.blogspot.com
Now are you looking at the card and wondering where the ribbon is???
Believe it or not, I used the White Organdy Ribbon to create my background.  To create this effect I cut out my one inch frame (the aqua striped background) leaving an empty square in the center.  I then added adhesive all around the border and laid out my ribbon pieces diagonally.  I then slowly went through and weaved my rows for the other direction.

It kind of reminds me of the look of vellum!  And doing the weaving on the diagonal instead of straight across adds a different interest.

Love this look?  Next week I will be back with a less subtle, but still just as fun weaving project with our Delight Satin Edge Ribbon!  See you then!

Saturday, September 7, 2013

Five Minute Bows

I shared this post over at Ribbons Unlimited a few days ago!
I have a 6 year old daughter who loves to wear hair bows.  But because she is six, bows tend to get lost, get dirty, or just plain fall apart from use.  I have found a quick, easy way to make hair bows for her that makes it so I always have a bow to match those special outfits and I don't have to spend hours creating them! I even created one at 11:00 pm the night before school started. Best of all you don't have to be able to tie a pretty bow to create these because these ones take a shortcut! 

 Today I have several varieties to share with you, but first let's start off with a tutorial!  

How to make five minute hairbows using wired or unwired ribbon
 Using your fingers as a guide, wrap the ribbon around them as many times as you wish to create your bow.  For this bow I went around three times.  I start in the middle and end in the middle so the ends are hidden beneath the knot.

How to make five minute hairbows using wired or unwired ribbon
Cut an additional piece of ribbon to use to create your knot and tails.  Again, the length is up to you and the look you are going for.  I usually err on the side of long and then trim it up. Tie a tight knot and adjust the tails to look as you want them to.

How to make five minute hairbows using wired or unwired ribbon
Attach it to a hair clip either using some liquid adhesive, sewing, or a glue gun.  I use alligator clips for this type of bow and slide the top part into the knot, so liquid adhesive works great!  As you can see, these would also work great for a card or gift wrap!

Ribbons Unlimited carries many different types of ribbon and I wanted to show you how this bow looks using different styles of ribbon.  I had a lovely 6 year old model help me out :)

How to make five minute hairbows using wired or unwired ribbon
This one uses the Strawberry Organdy Ribbon, I wrapped it around three times, and I notched the tails.

How to make five minute hairbows using wired or unwired ribbon
I was surprised to find out that wired ribbon works really well for these.  I wouldn't use it for little girls, but for a big girl it will be fine.  The wire is very thin and actually reminds me of fishing line.  the wire makes for a beautiful, fluffy bow!  This one uses the Champagne with White Dots ribbon.  I wrapped it around twice and angled the tail.

How to make five minute hairbows using wired or unwired ribbon
Another wired ribbon! This one is the Berry Ombre Ribbon.  I wrapped it just once and angled the tails.

How to make five minute hairbows using wired or unwired ribbon
This last one uses the Celadon Lyon French Wired Ribbon.  I wrapped this one around twice and trimmed the tails short so you can't see them.

Thanks for joining us here today!


Friday, August 16, 2013

Congrats Card

Today I have one last GCD Studios card to share with you!  It's a pretty clean and simple card that was originally intended to go in there monthly magazine but alas no more!
I decided to go with slanted lines and focus on a blue and yellow color scheme.  The borders and papers all come from GCD Studios (various lines).  II also added several stickers from them to my cluster.  The lovely ribbon (possibly my favorite ribbon EVER) comes from Ribbons Unlimited.  I just got it in navy blue stripes too, oh soooo pretty!  

Supplies Used:
Patterned Paper: GCD Studios
Wood: Studio Calico
Enamel Dots: My Minds Eye
Ribbon: Ribbons Unlimited
Stickers: GCD Studios & Doodlebug

Tuesday, July 30, 2013

Upcoming Storage Class: Webster's Pages Citrus Squeeze

On August 17th I am going to be teaching a class at The Scrapbooking Studio featuring these five containers perfect for your craft room or area.  They feature the beautiful Citrus Squeeze line from Webster's Pages!


These simple storage pieces are designed by fellow Ribbons Unlimited Design team member Jamie and cut out on my Silhouette Cameo.

Pencil (or scissors, ruler, markers...) holder

Round marker box

Desk caddy (my kids have requested these now)

Washi Tape Holder with two different sized drawers to accomodate different sized rolls.

This last box is awesome!  It can hold alcohol inks, stickles, paint...anything with that smaller body type and it has room for twenty of them.  As you can see I couldn't fill it up!

I'd love to have you join me for this class!  If you are interested, call the store at (309)585-0409

Supplies Used:
Websters Pages Patterned Paper
My Minds Eye Washi Tape
American Crafts Cardstock

Monday, July 29, 2013

Storage Cabinet from Gina's Designs

 I can't believe we are already smack dab at the end of July!  One of my summer goals was to work on putting together this storage piece and Ribbons Unlimited had the perfect ribbon to help me finish it off!  Organdy ribbon is probably my favorite (and go to) ribbon on most projects.  I love the selection that Ribbons Unlimited has of this gorgeous ribbon!

This storage piece comes from Gina's Designs and you have to assemble each drawer.  I covered mine with various patterned paper from Echo Park's "Beautiful Life" line.


I then tied bows using the Strawberry Organdy Ribbon .  I stuck a large brad through the bow and then put them through the drawer hole.  The ribbon is perfect for being the pull to get the drawers out and adding a feminine and pretty touch!

Supplies Used:
Echo Park Paper "Beautiful Life"
We R Memory Keepers Brads

Wednesday, July 3, 2013

My Premiere at Ribbons Unlimited!

Today was my very first post over at Ribbons Unlimited!  If you haven't checked out their blog you can find it by clicking on this link...they have some mega talents there!  I love playing with ribbon and I love trying to incorporate a couple different types of it into my projects.  Today I have a card to share with you that uses two different ribbons!  I pulled out the new American Crafts line "Mayberry" and combined it with a doily from Gina's Designs.  
I love how ribbon can add a pop of color and texture to a background.  To create my yellow ribbon scallops I used the Sew Ribbon Scallop Tool by We R Memory Keepers and created several rows to weave the ribbon through.  It was the perfect size ribbon to fit!


I then decided to use the sheer ribbon to add a pretty bow to the bottom of the card.  It's a totally different texture than the grosgrain but it works!  I flipped the tails of my bow in different directions so that they didn't make the bottom of the card too heavy.


Supplies Used
Ribbon - Strawberry Organdy Ribbon & Yellow Grosgrain Stripes Ribbon - Ribbons Unlimited
Die Cuts & Stickers - American Crafts
Sequins - Pebbles
Doily - Gina's Designs
Pearls - Ranger

LinkWithin

Related Posts Plugin for WordPress, Blogger...